
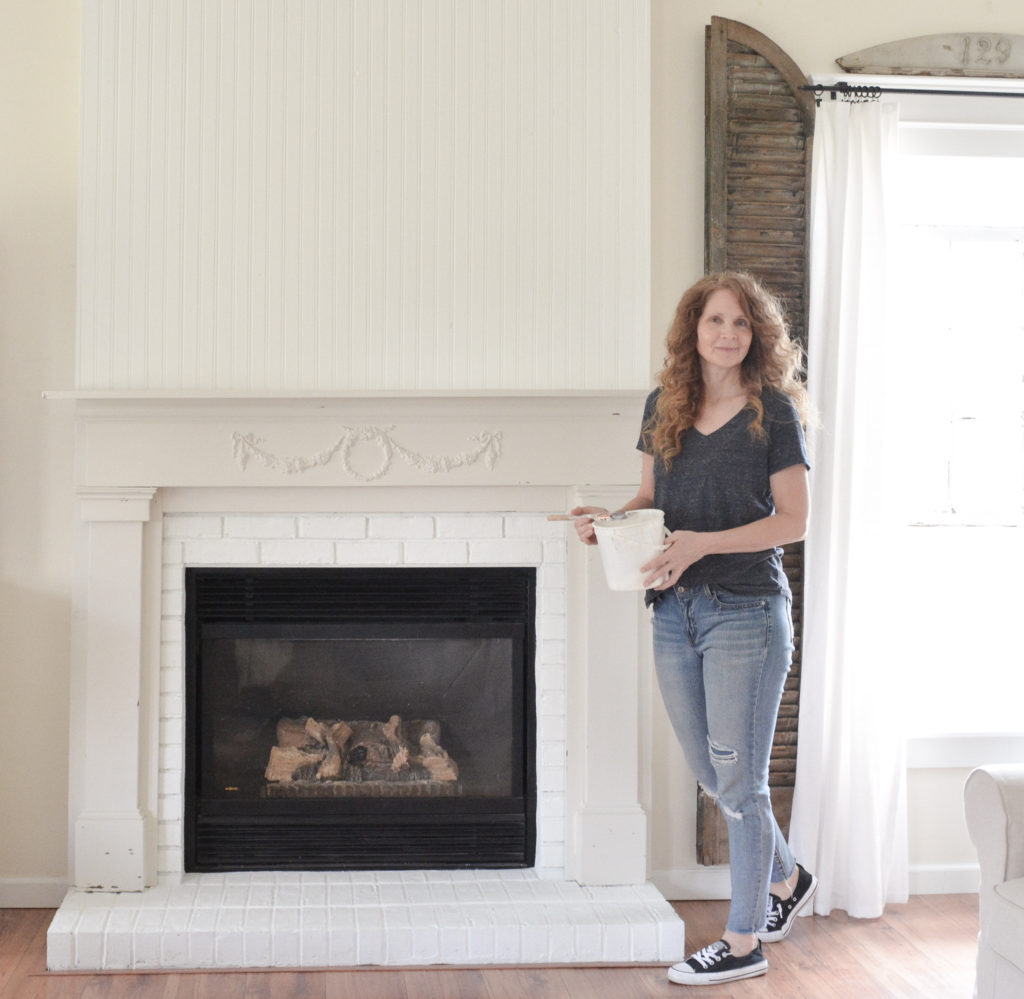
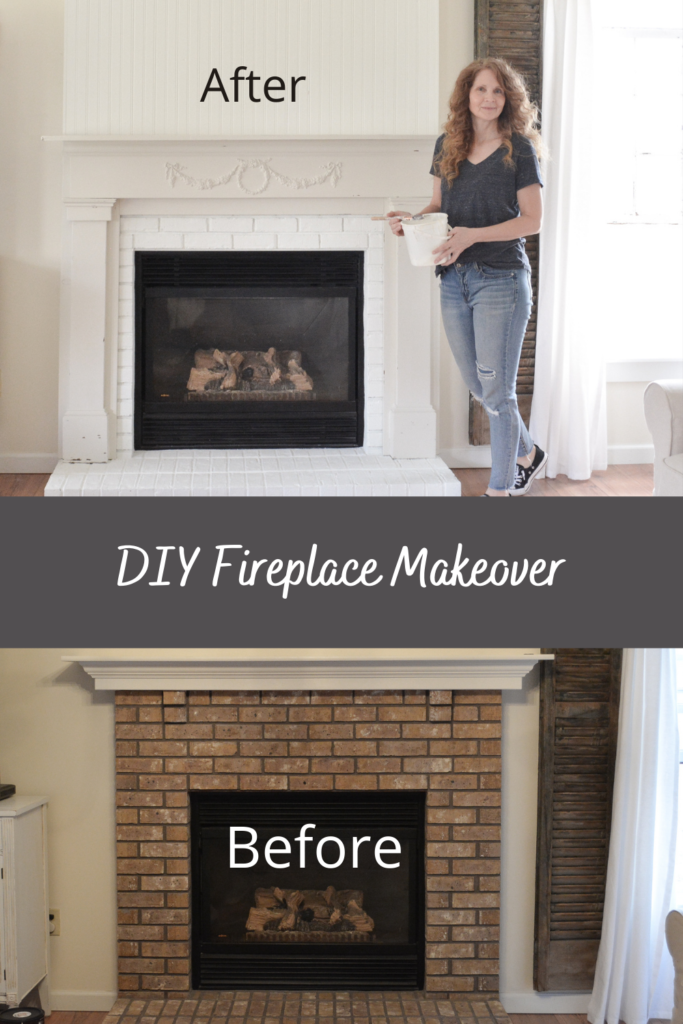
Today I am going to share a before and after DIY fireplace makeover in our family/great room. I built out a box and covered it with bead board for an over mantel, painted the brick white, and built a new mantel. You can see how I built the mantel here.
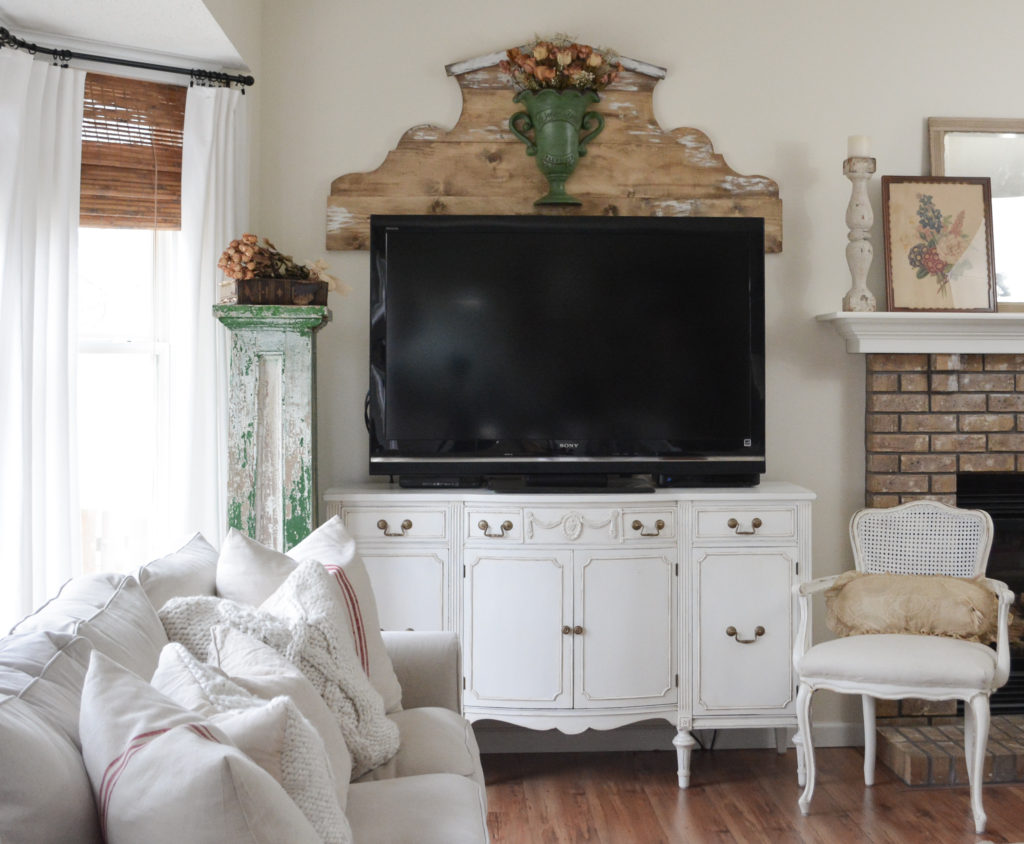
The family/great room is the most used room in our home. It holds the TV, fireplace, and all the comfy furniture. It’s not always the most fun room to decorate because of all the use and the giant black box, but it is time to get this room looking pretty. The first project I completed was the buffet makeover to hold the TV, and building the wooden plaque to put over it.
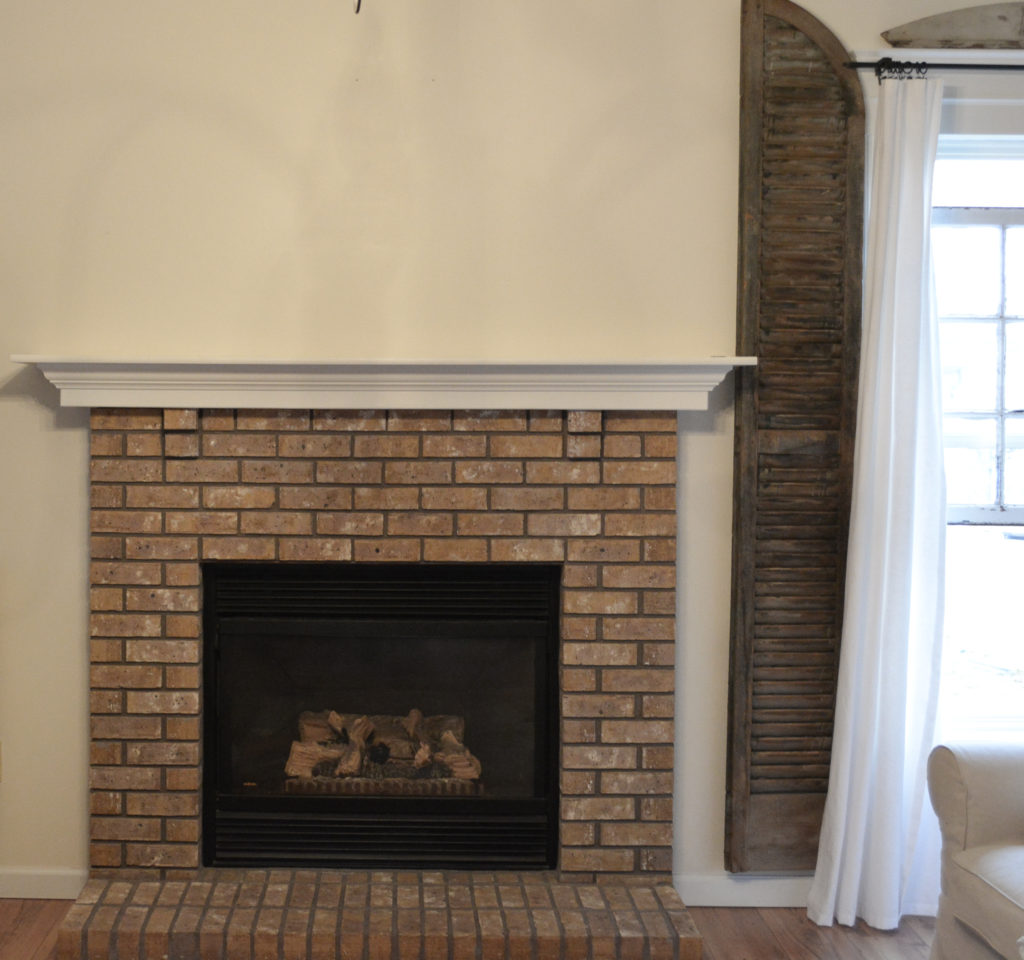
The Before
Here is a look at the fireplace before. There was brown brick and a mantel shelf.
After I changed up the TV area, I felt like the wall was just a run on of this and that, no definition or separation.
The first thing I did was paint the brick white. I used Behr Falling Snow in flat for the brick and the bead board.
Next, I knew I would need to build a structure that protruded from the wall to form two separate sides of the fireplace. This is what I came up with.
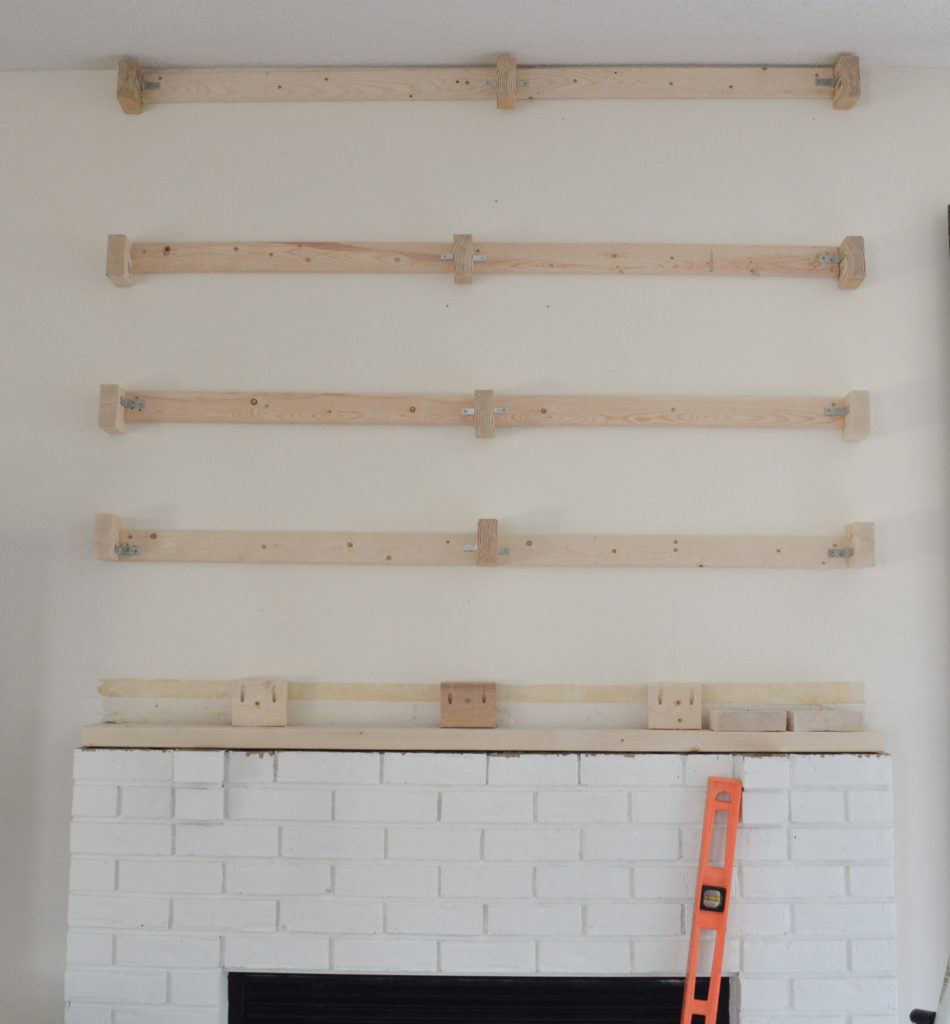
Let me just say, this is not a post about how to build this over mantel. It worked out in the end, but I wouldn’t recommend this method. I am sharing it just to give you an idea of what I did. I wanted the bump out to be even with the brick, which caused all kinds of odd measurements and caused me all kinds of trouble.
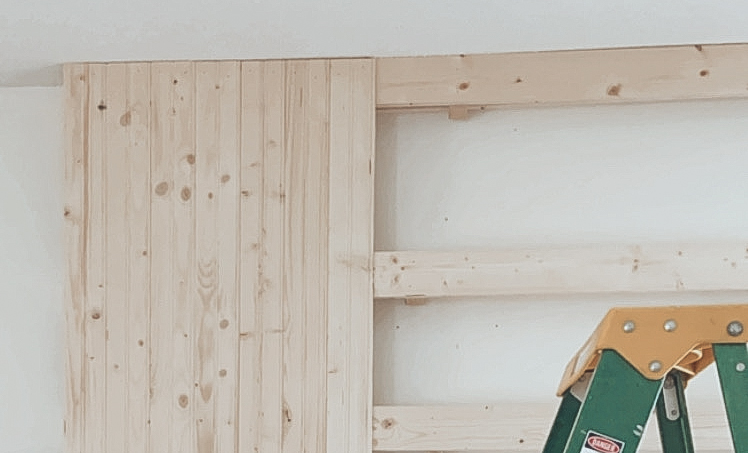
Basically, I built a frame and covered it with bead board. I then trimmed the top out with crown molding. And the best part of all? The new vintage inspired fireplace mantel that I built.
I will be sharing all the details on how I built this Mantel in a future post. The only hard part of building the mantel was deciding on the design. There are so many options, and I wanted them all!
The After
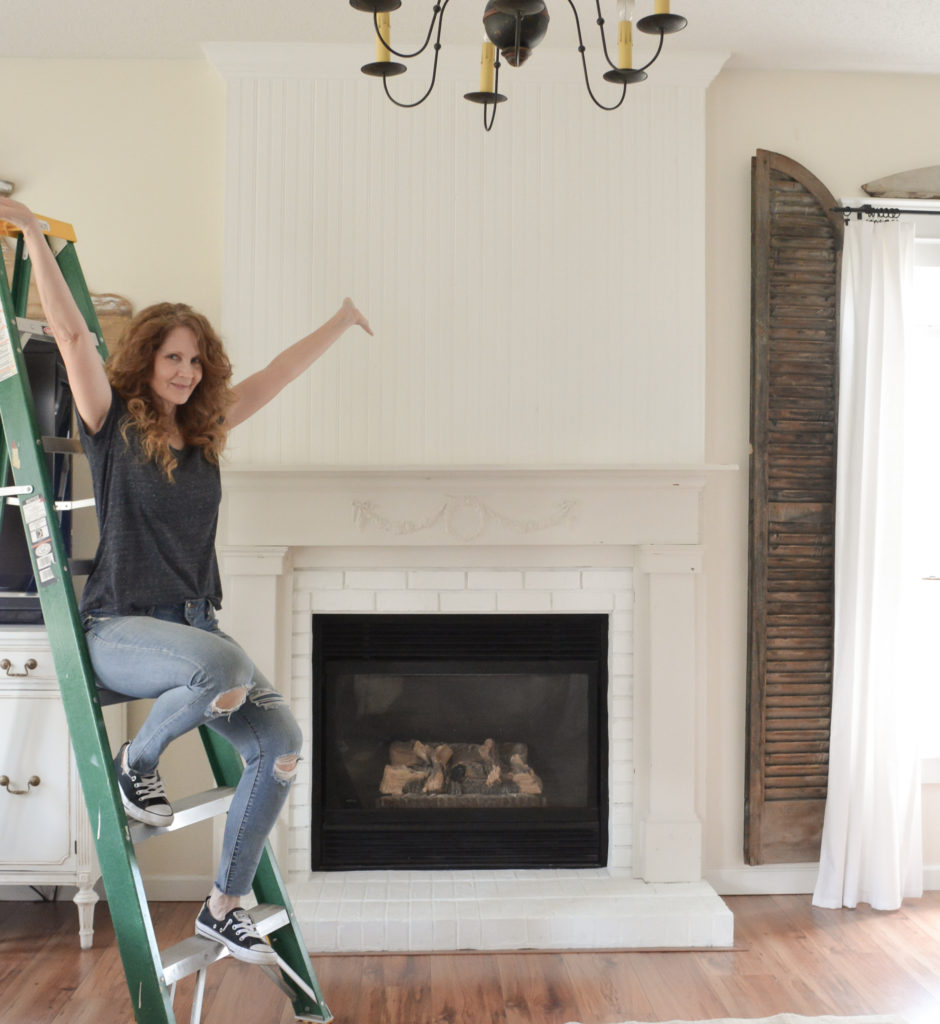
Can you tell I was a little excited to finish this project? It accomplished all the things I wanted it to. I wanted lighter and brighter, I wanted separation of the two sides of the fireplace, and I wanted a vintage looking mantel.
I am a little behind on my blog posts, but I will be sharing how I built the mantel. Also coming up on the blog is how I accessorized the mantel with light sconces turned candle holders and a DIY fireplace screen. All that sprinkled in with my current projects, fingers crossed haha!
Pin It For Later!
Thanks for stopping by,
Janet
I love the new look, very fresh and bright but still has that romantic and cozy quality. Definitely can tell this one made you happy to complete!
Thank you so much! And thanks for taking the time to read!
You did a great job, as usual, I love the new look !
Thank You! I appreciate you reading my post!