
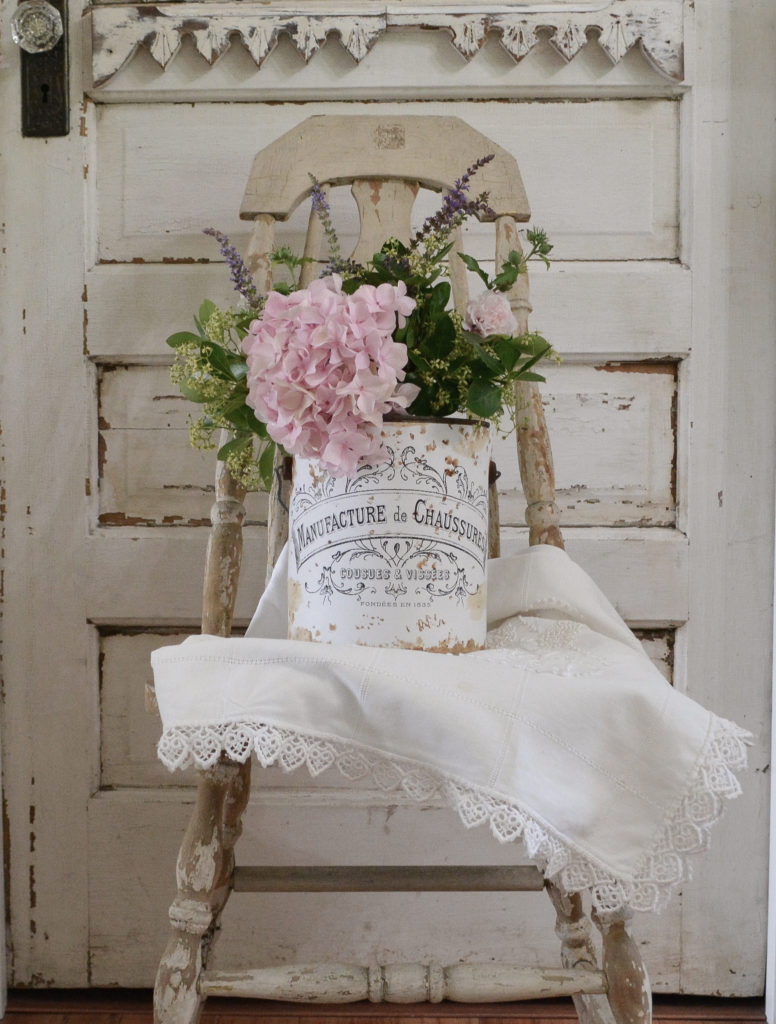
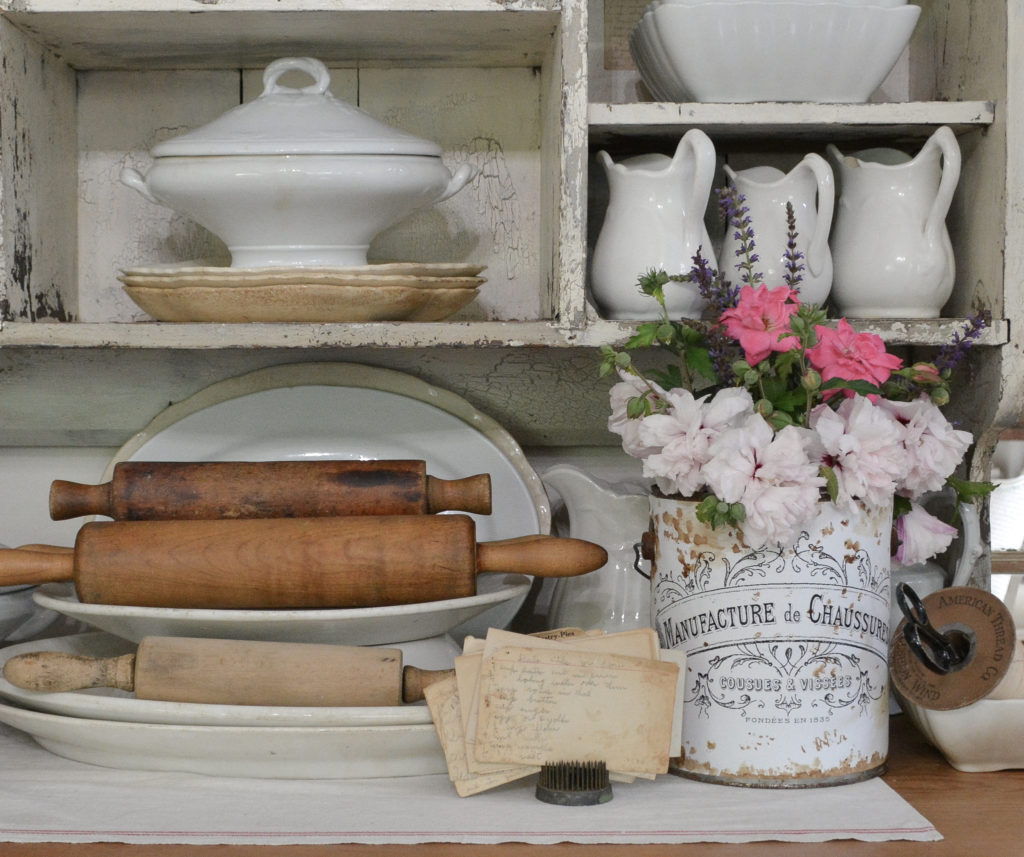
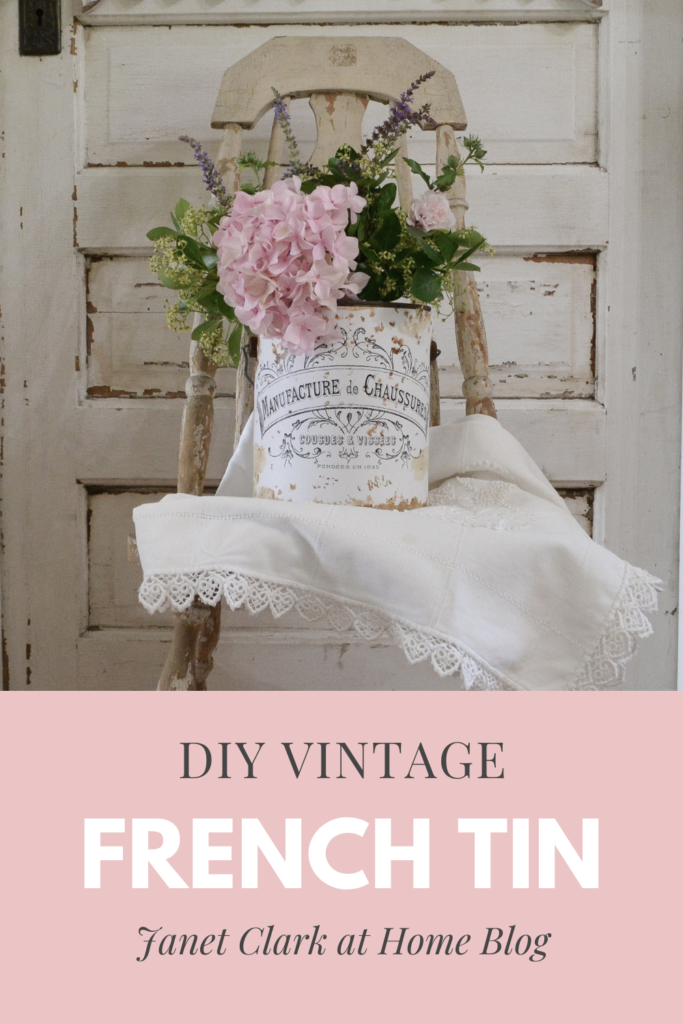
I love Vintage tins and old buckets to hold cut flowers. After seeing so many images on Pinterest, I knew I had to make some for myself. The first project was a DIY vintage French tin.
Supplies
- an old can
- a paper graphic and a plain sheet of paper
- glue (I used a glue gun)
- instant tea and a tea bag
How to DIY a vintage french tin
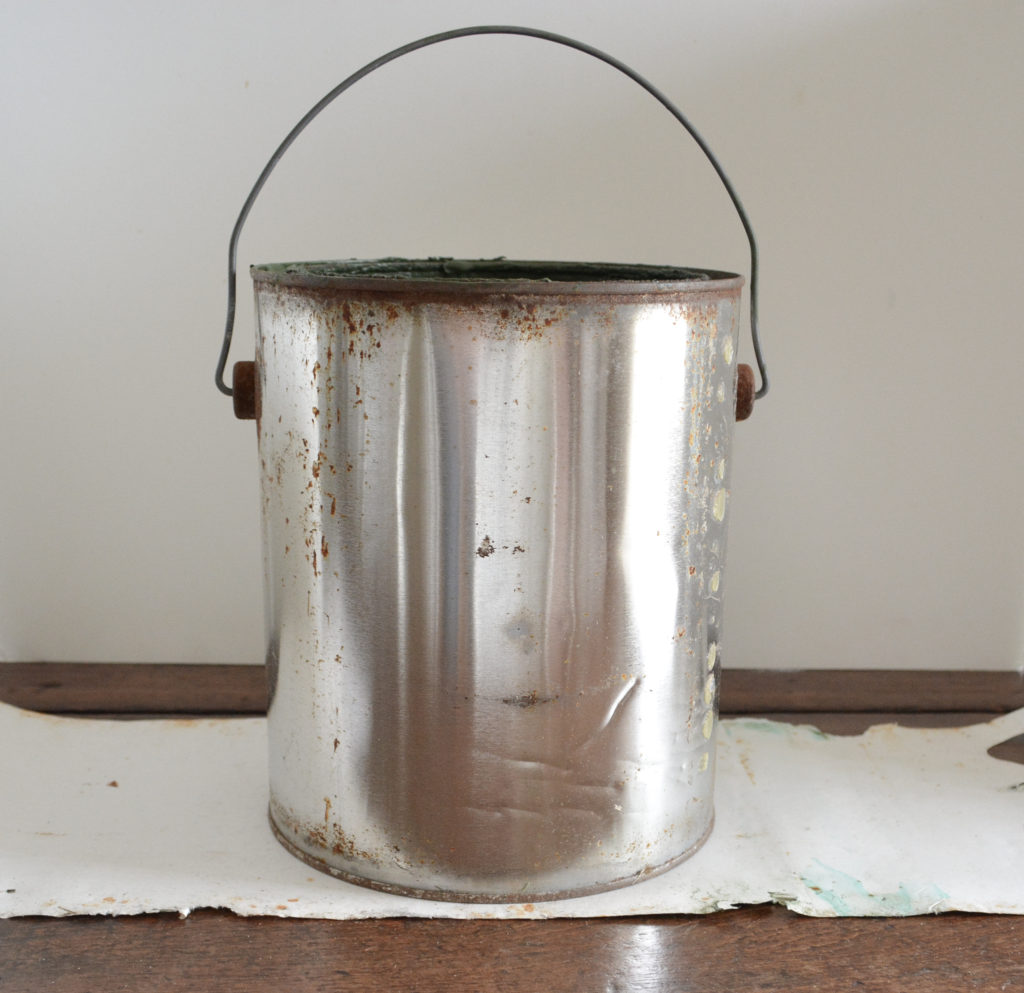
What better than an old rusty, crusty paint can to start with?

Step 1 – Remove the old paper from the paint can
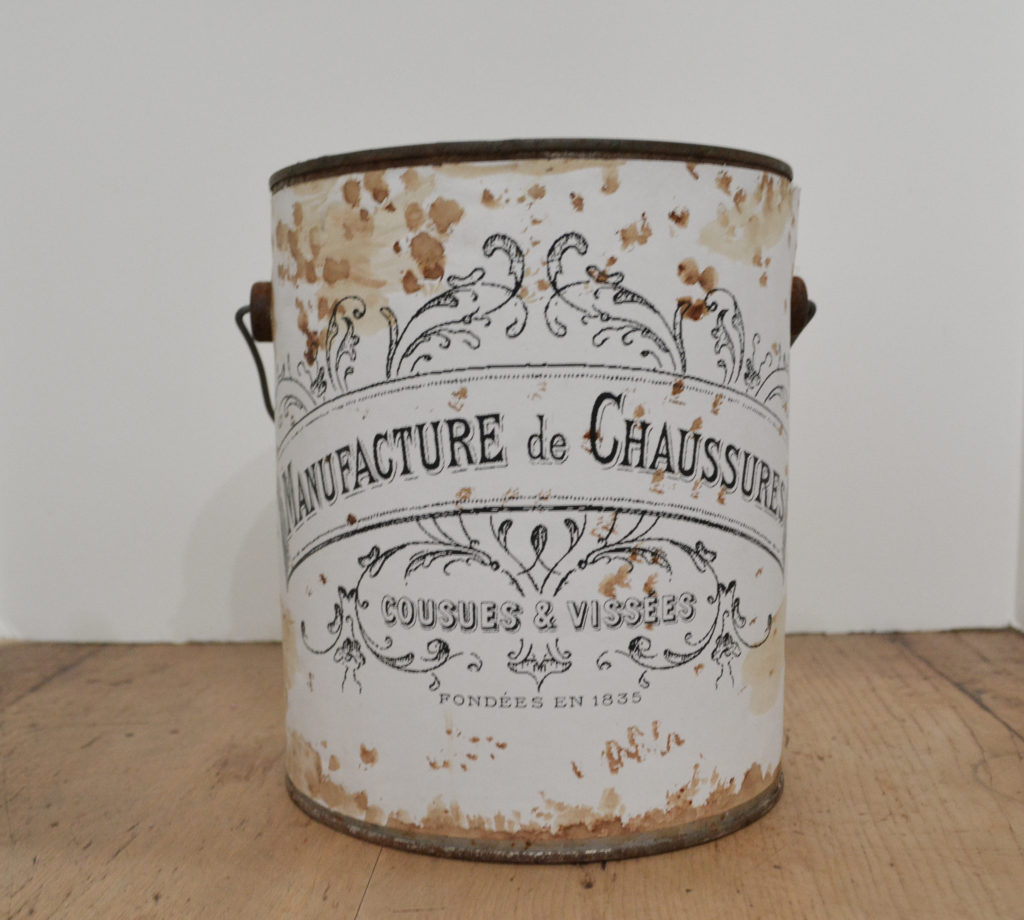
Step 2 – Add the french graphic
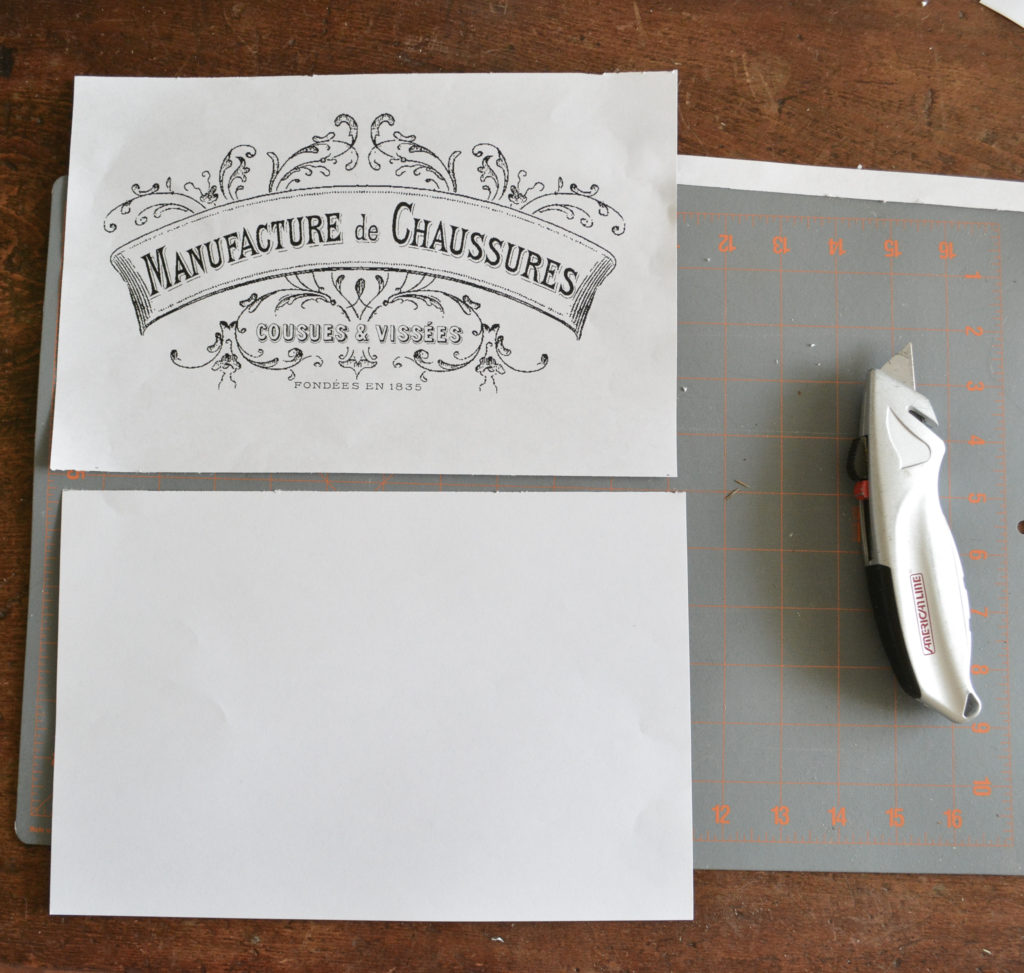
You can find many free printable graphics from The Graphics Fairy Blog. I chose a french shoe manufacturing label.
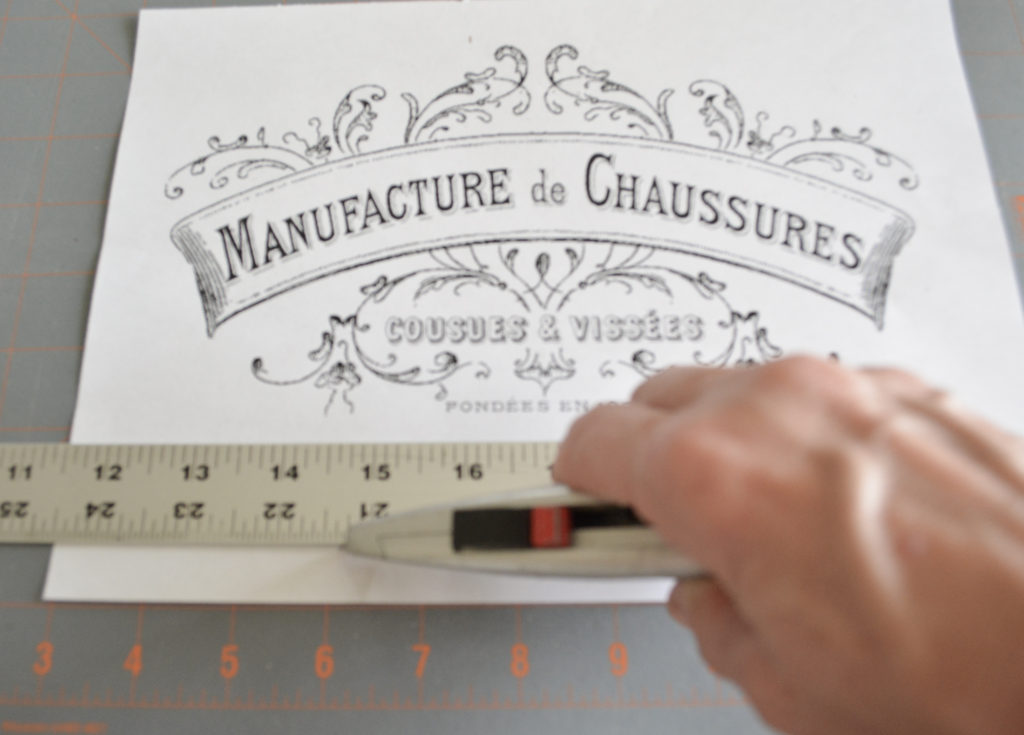
Cut the graphic to the size of your can. Of course you can use scissors, but I like to use a blade and straight edge.
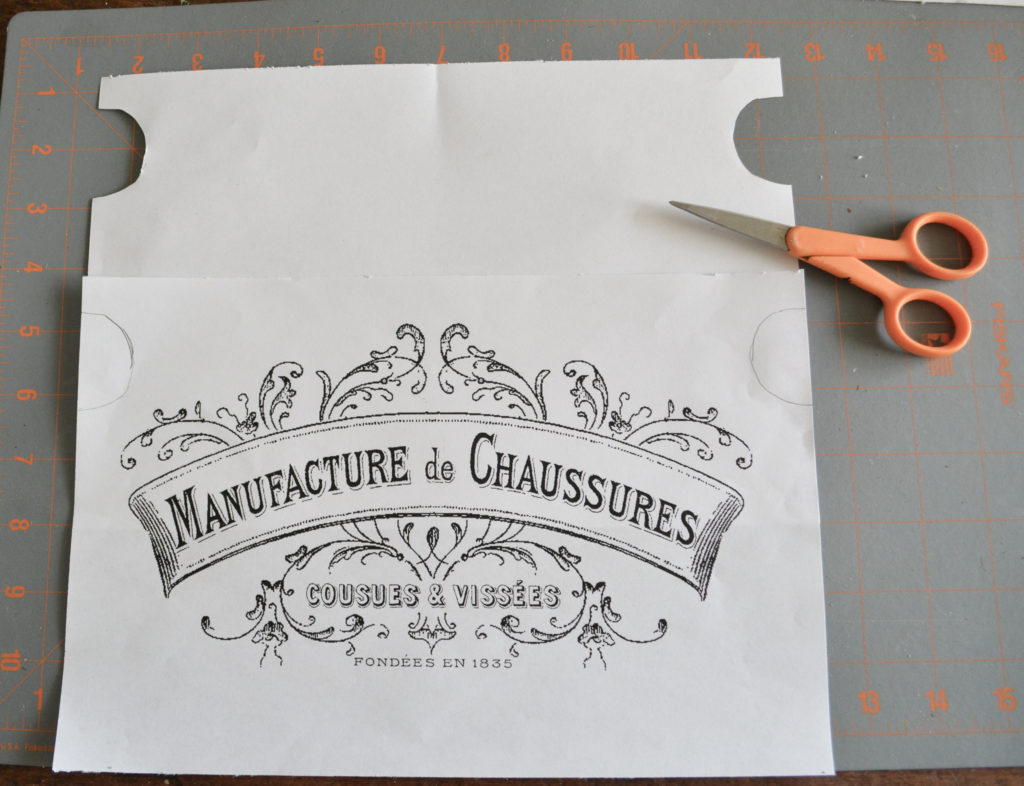
Cut out holes for the handles if your can has them.
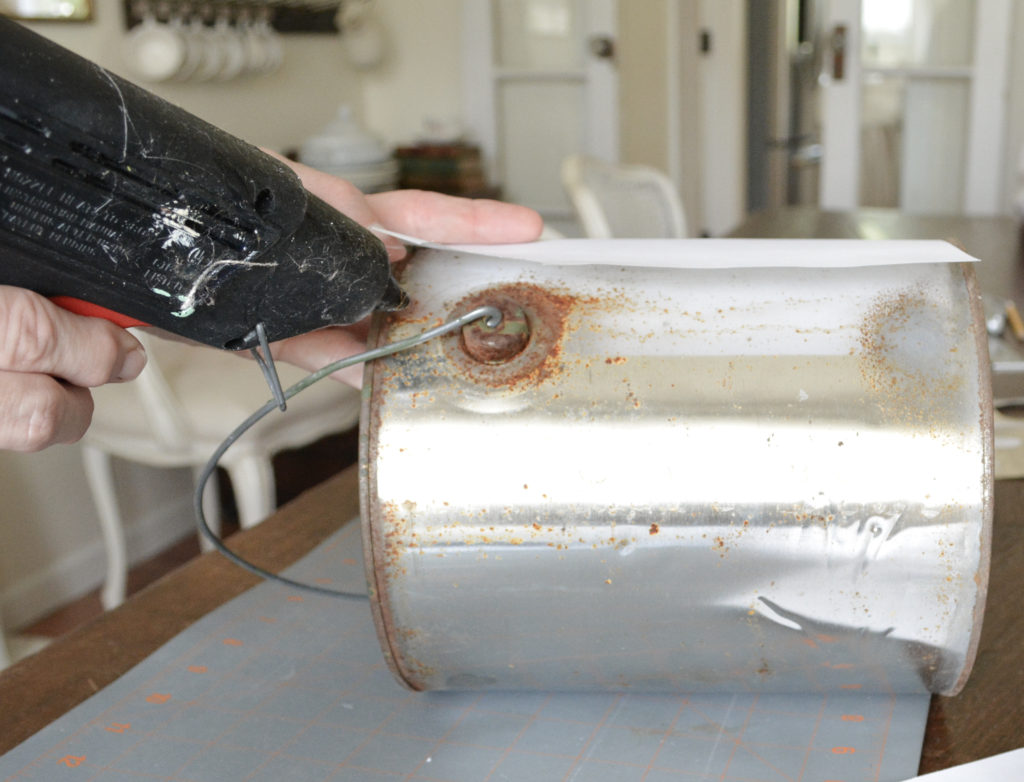
Start with the plain piece of paper for the back and glue the edges. Then wrap the graphic around the front and glue the edges, overlapping the paper.
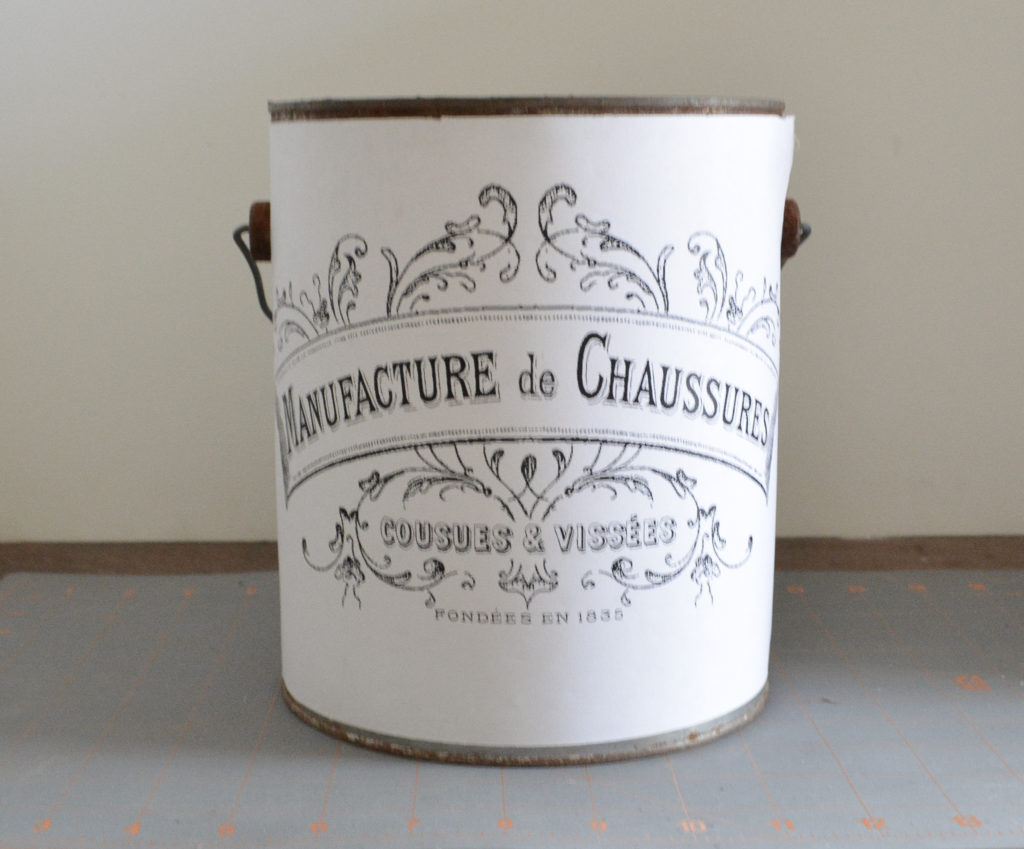
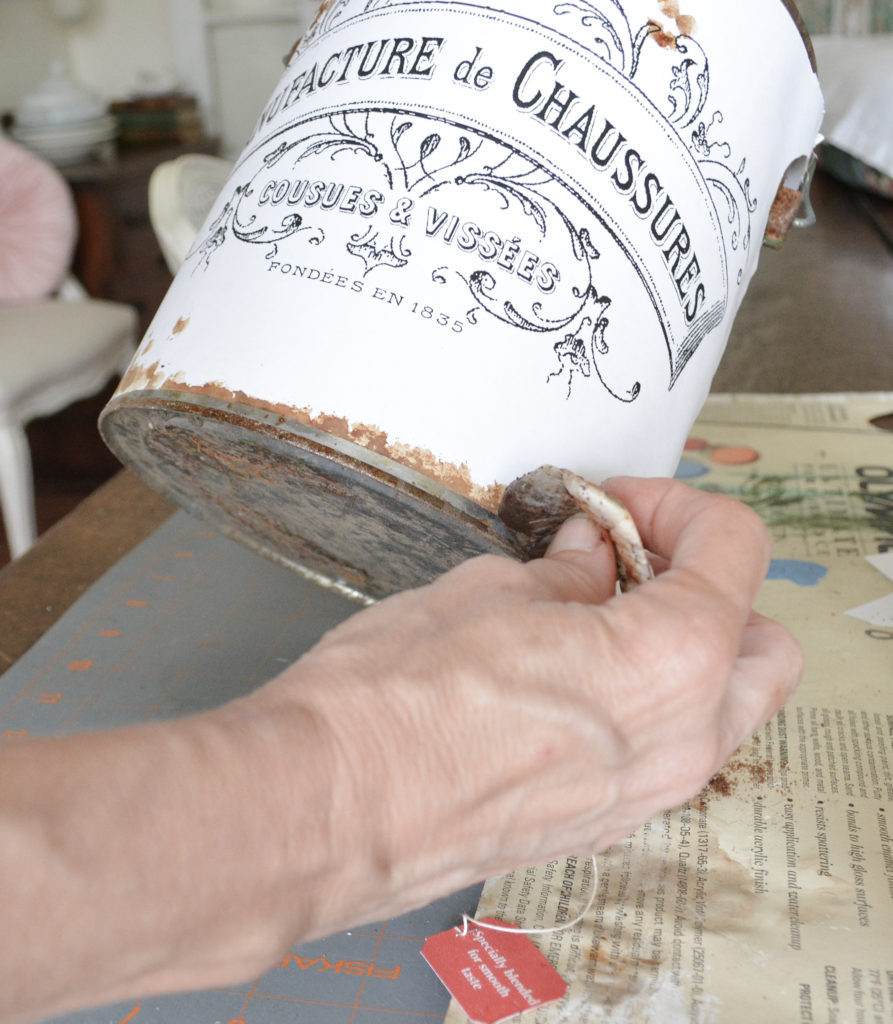
Step 3 – Add rust spots with tea staining

You can see more detailed tea staining here. Basically, just dab dry instant tea on the paper with a wet tea bag, creating rust around the edges and random spots.
TaDa! You’re Done! Ten minutes and the price of two pieces of paper and you have a vintage french tin.
Pin It For Later!
Thanks for stopping by,
Janet