Wow! That’s all I can say about this buffet makeover. Many hours were spent, and new skills were learned. In the middle of a project like this, I always say, “If I had known, I never would have bought this”. But when I see the finished project, I say “Yes, totally worth it!”.
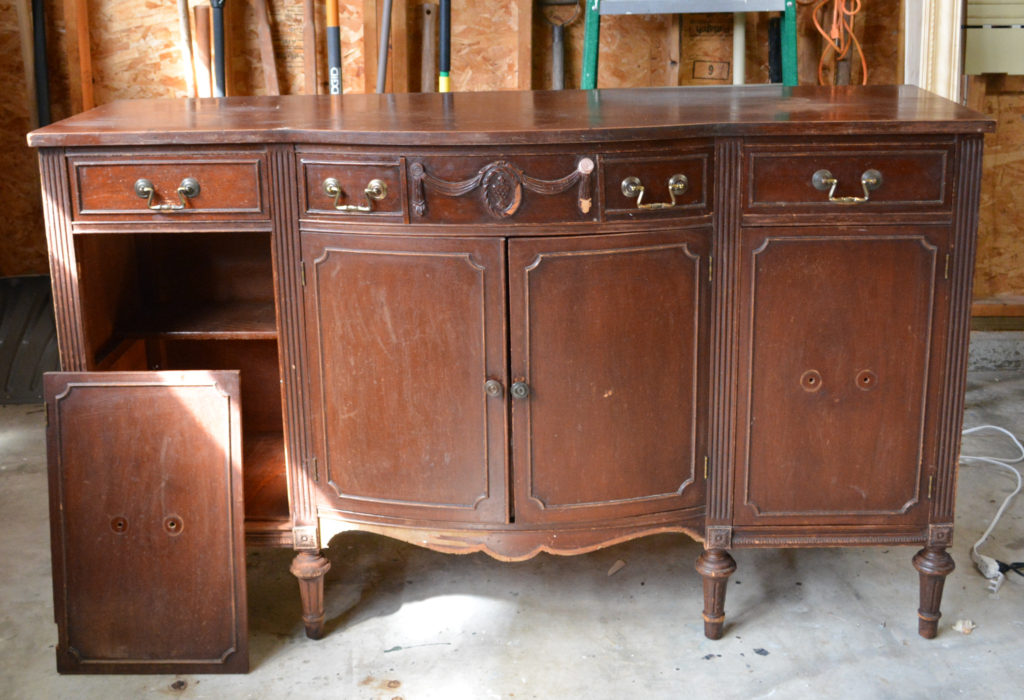
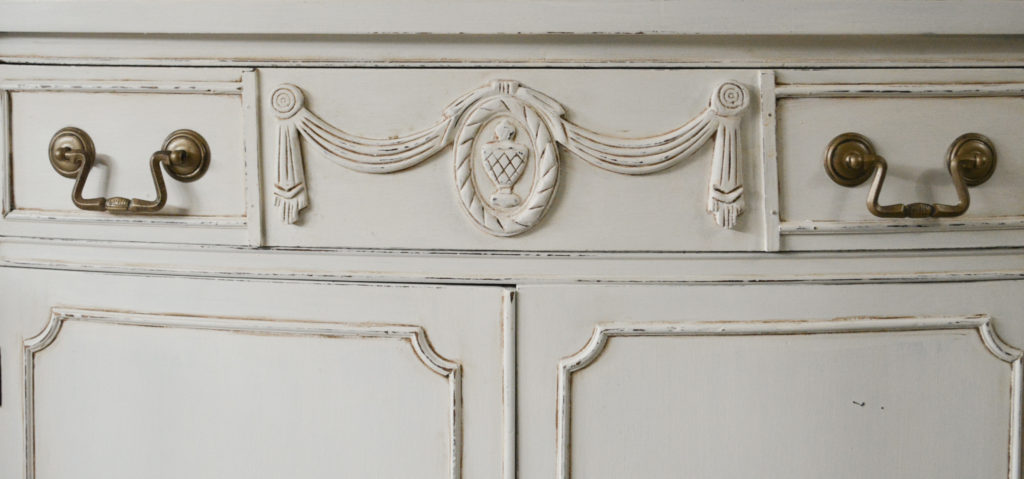
Before
Let’s take a look at the before issues.
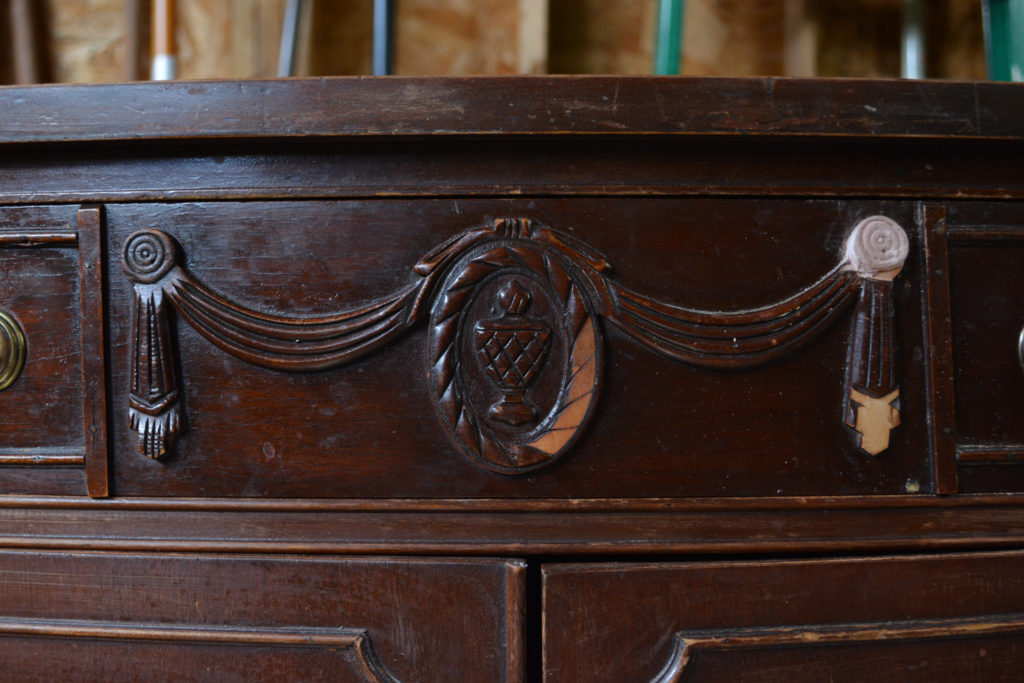
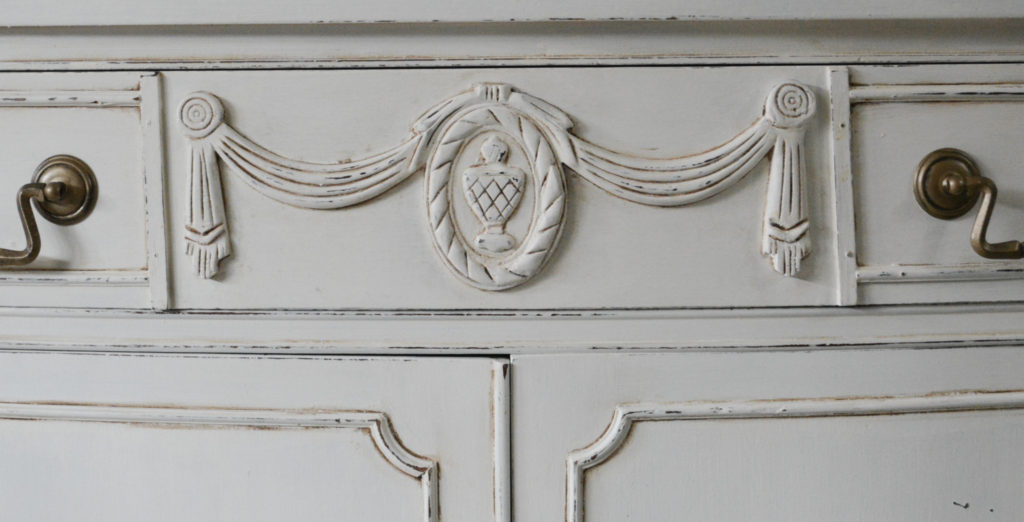
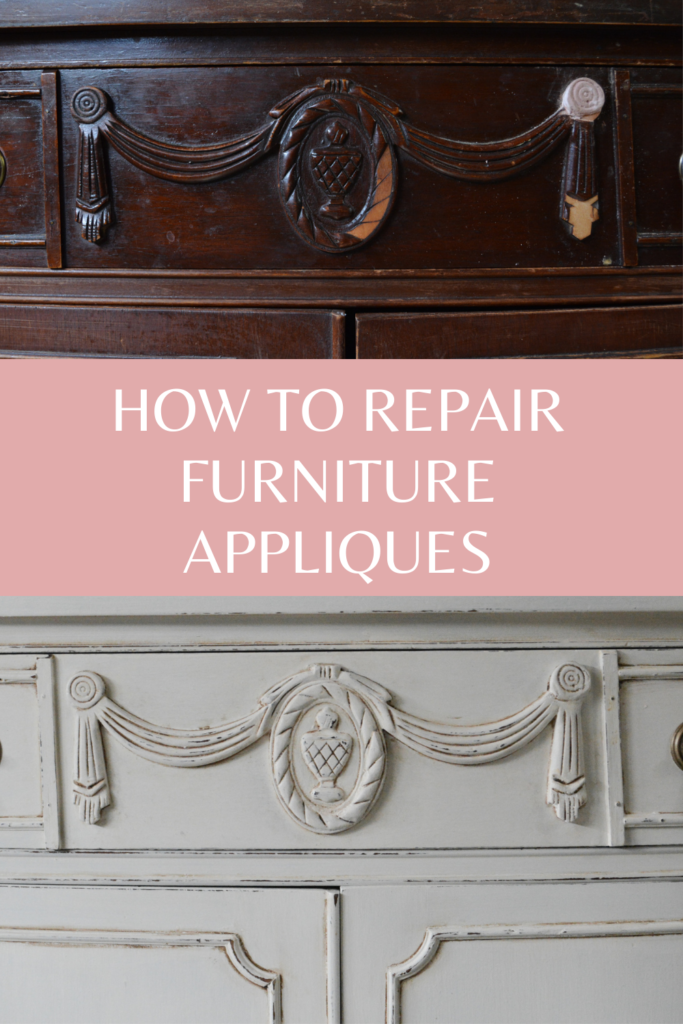
Pieces of the applique were missing on the middle drawer ( I had already made one replacement when I took this picture). I was so excited to try this, I forgot to take a picture first!
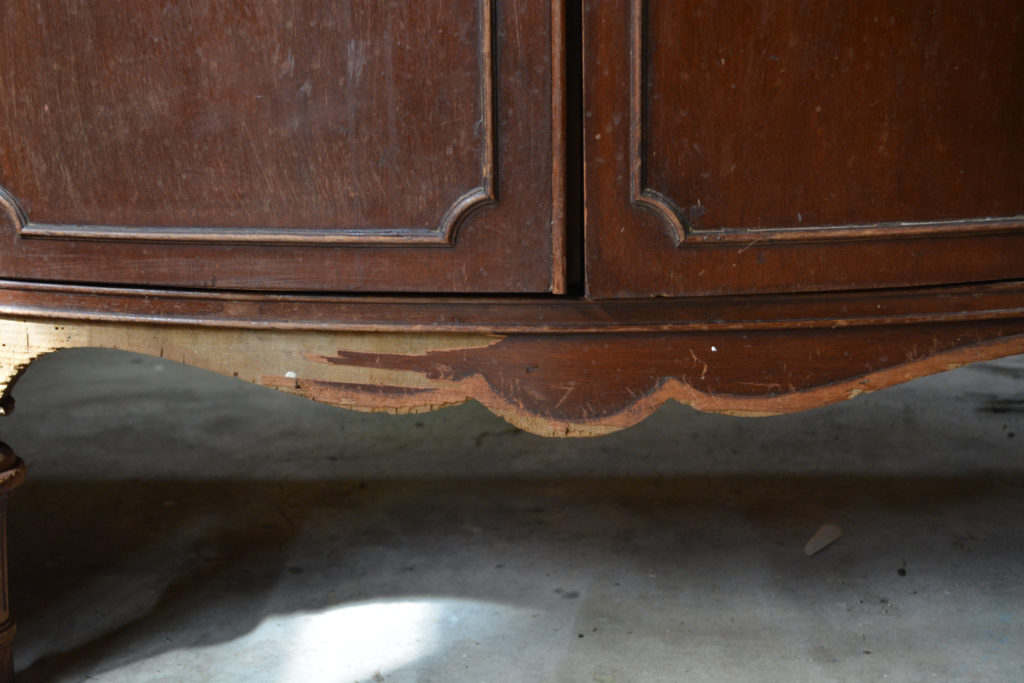
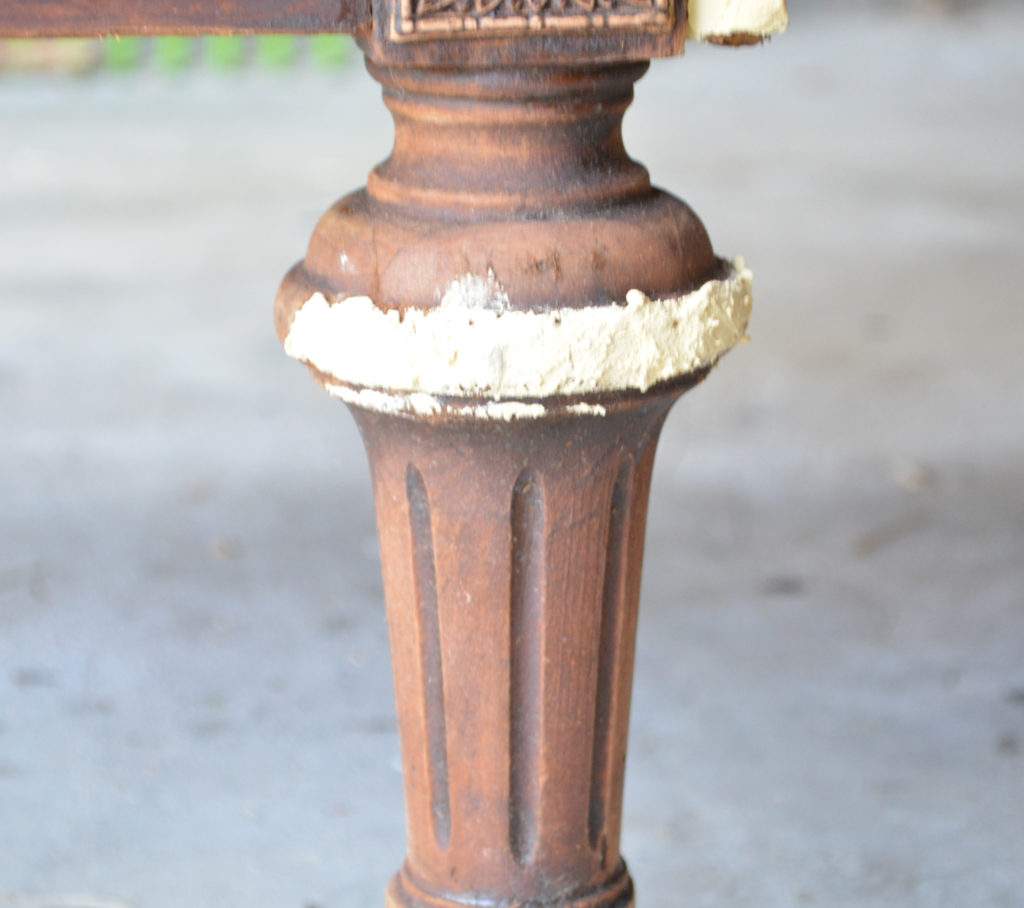
An applique had been broken off the bottom and the veneer was missing.
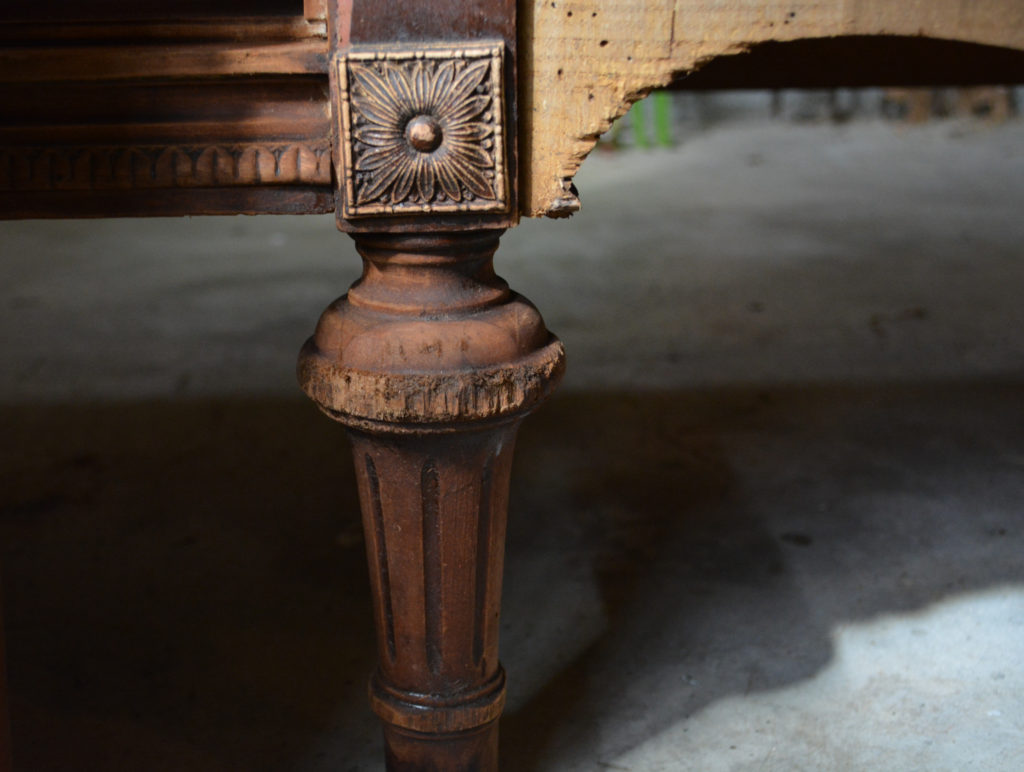
A leg had been chewed up and I think the dog did something else to this side. So stinky! The varnish was all gooey from being wet. Yuck!
And also a bit of cigarette smoke smell. The absolute hardest smell to get rid of.
I hesitate to reveal all these nasty things. You probably think I’m crazy for bringing this into my house. But I assure you, all these issues were addressed and I’m going to show you how I did it.
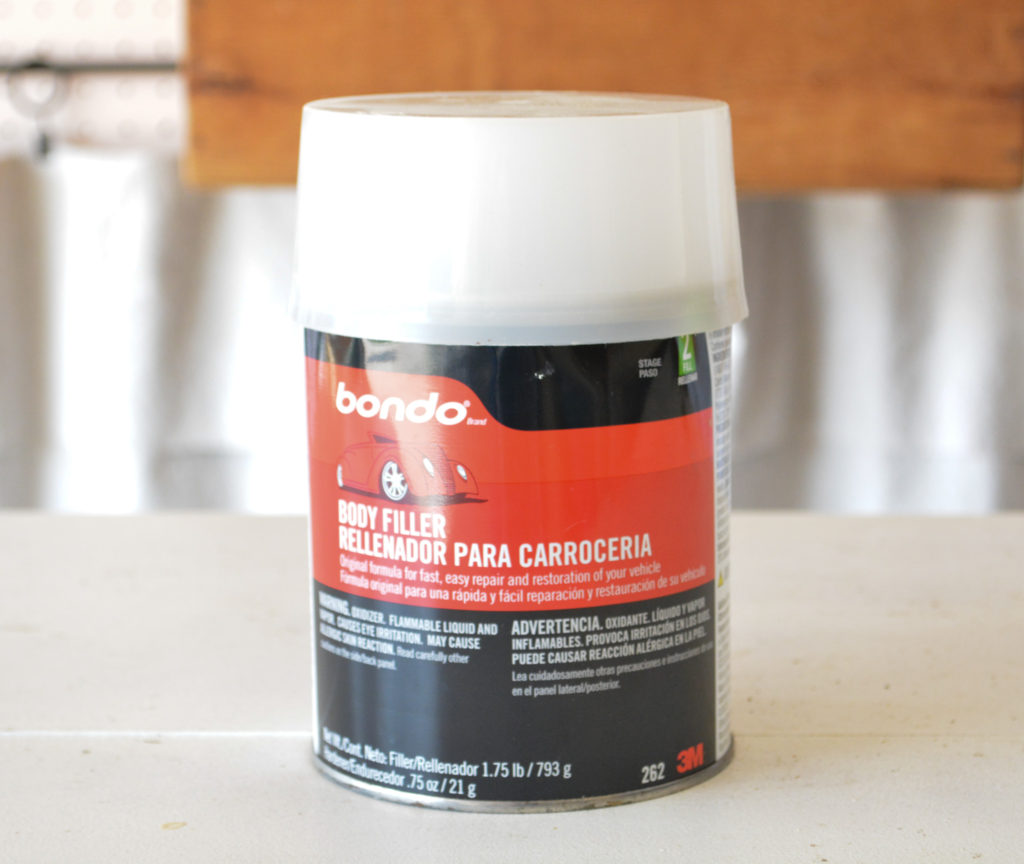
How to Make a Replacement Furniture Applique Using Bondo.
Step 1 – Make a Mold for the Applique with Hot Glue
In order for this method to work, you must have a duplicate piece of applique to make a mold.
Spray the area with cooking oil so the hot glue does not stick to the furniture.
Squeeze hot glue over the area you need to duplicate, let cool. Repeat with a second layer for a sturdy mold.
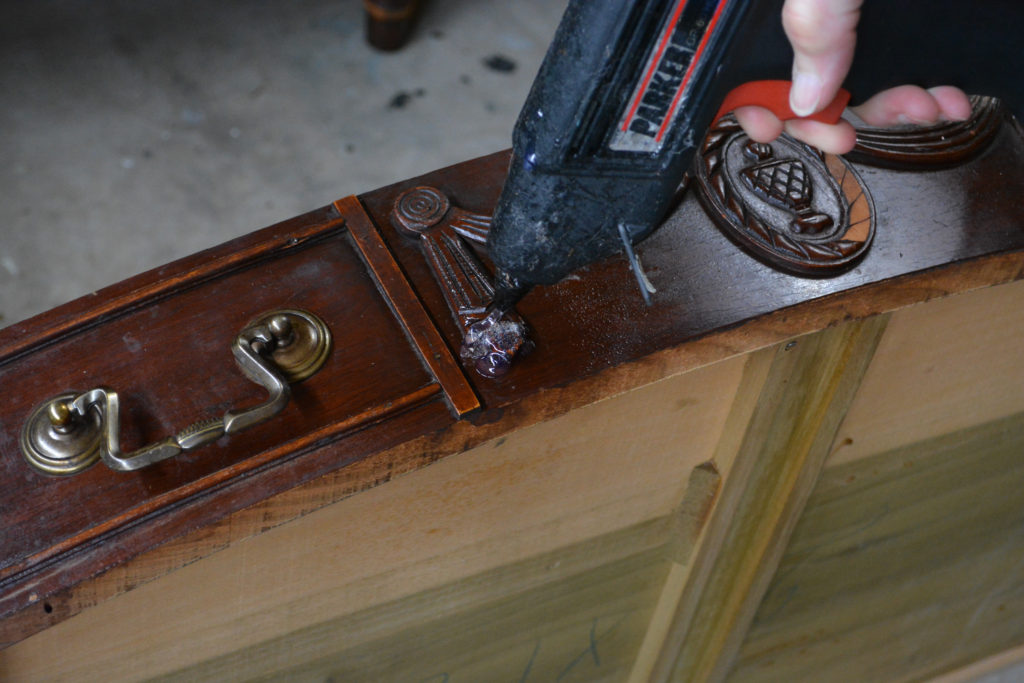
Peel off glue mold when cool.
Spray the hot glue mold with cooking oil.
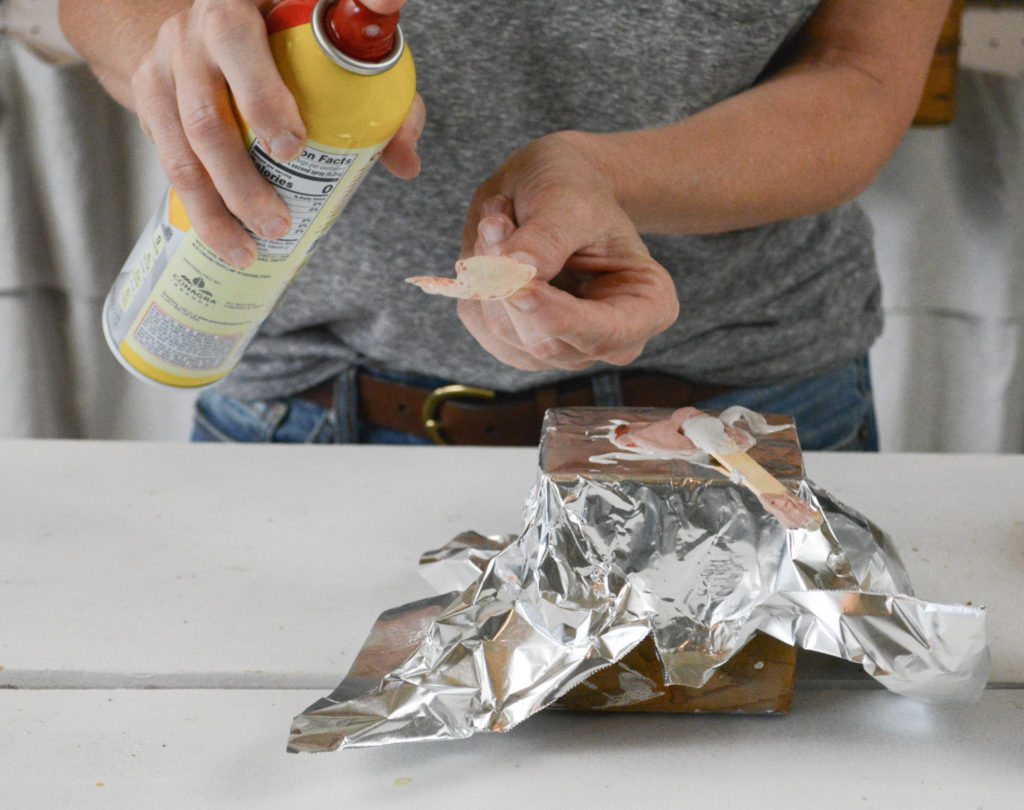
Mix the Bondo according to the directions. This dries very quickly, so be prepared for action.

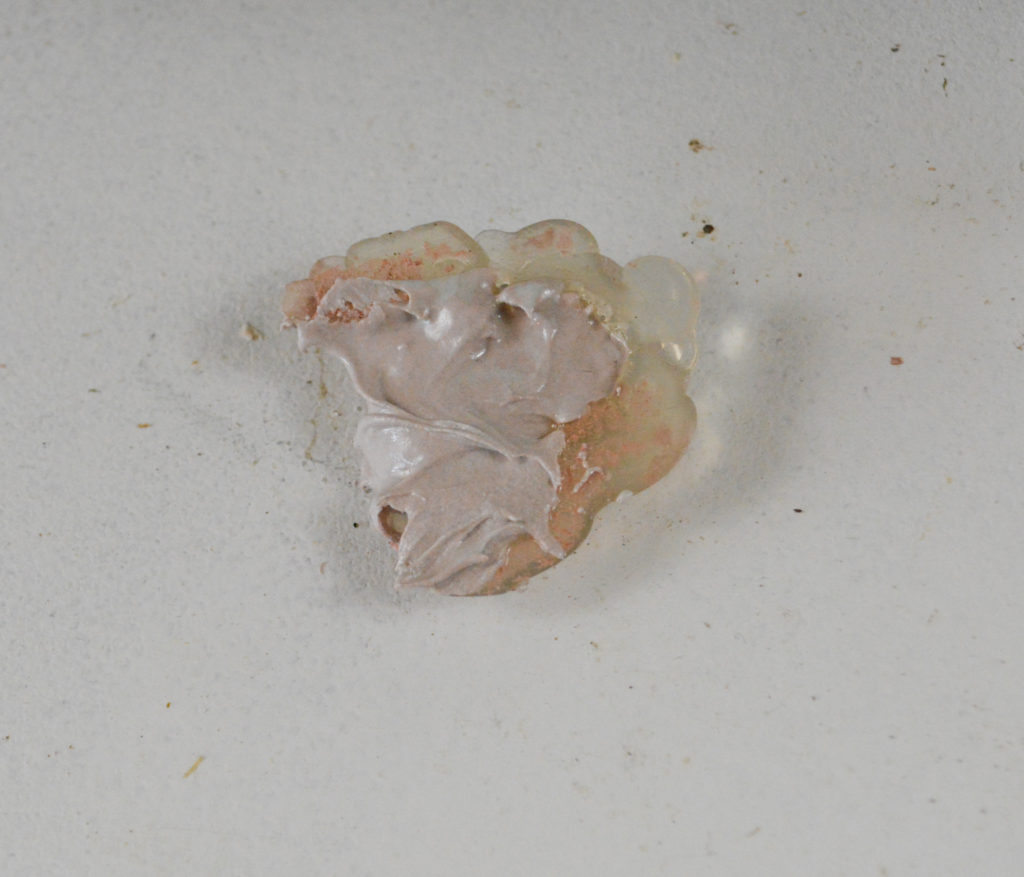
Fill the mold with the mixed Bondo.
Place the mold on the furniture. Push down and the excess will squeeze out. I cleaned off the excess at this time with a utility blade. Let dry before removing the mold. This only took about 20 minutes. It feels warm to the touch at first and then cools when dry.
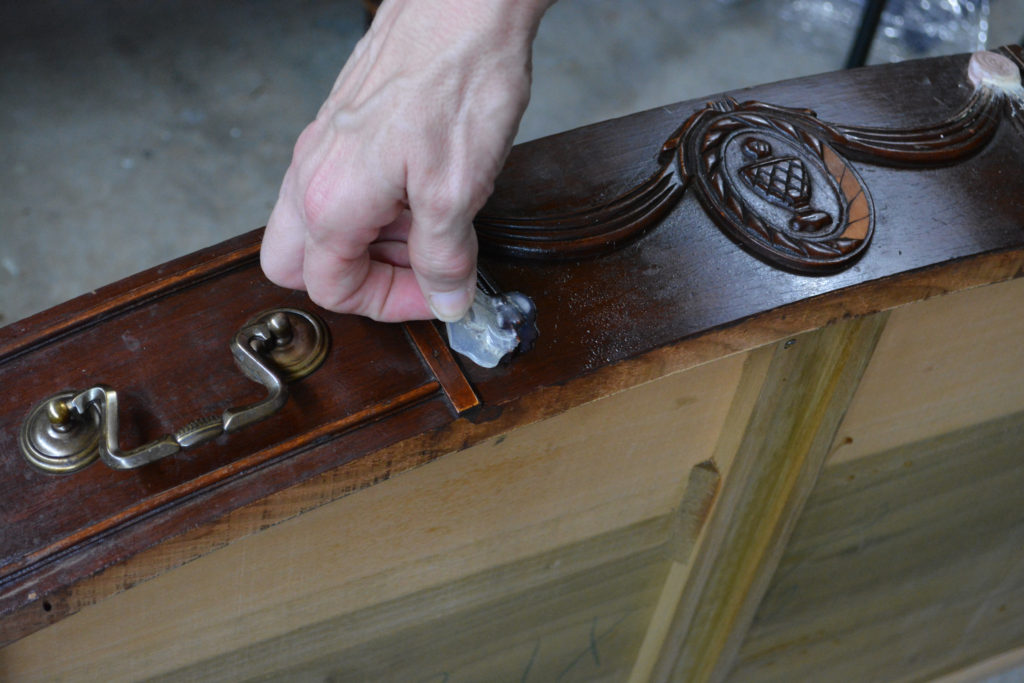
Remove the mold and you will have a new applique. Clean around the area with the utility blade and sand until you are happy with the shape and all the Bondo residue is gone.
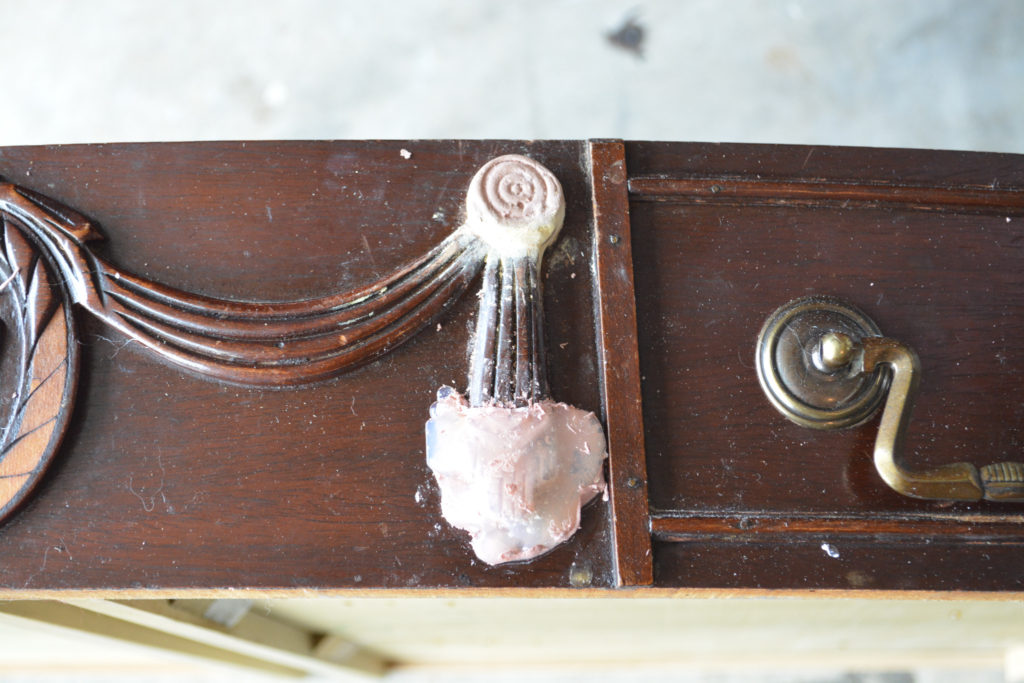
I repeated this process to make the replacement applique for the center.
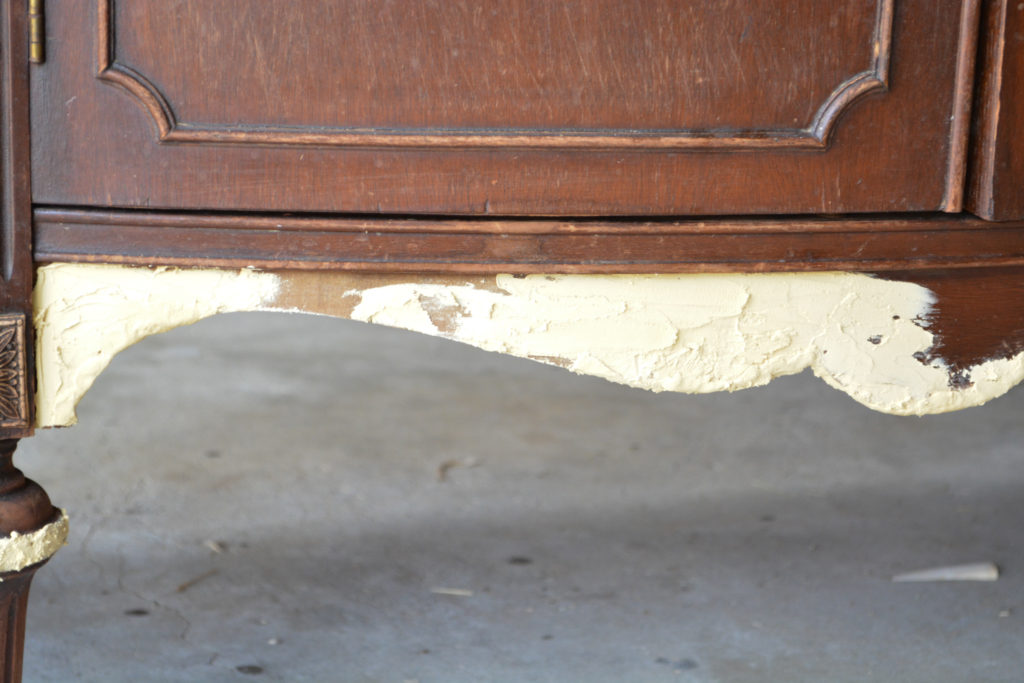
Repairing a Chewed Up Furniture Leg and Chipped Veneer
Lots and lots of wood filler was all that was needed. Use a putty knife and fill in all the chewed areas and the areas missing veneer.
After the wood filler dries, sand the area smooth. Run your fingers along the area, if you feel any bumpy areas, smooth them out. They will show when painted.
Blocking the Odors
In between all the drying and sanding, I worked on cleaning the buffet. I wrote a post on cleaning antiques and followed those same steps. After all the cleaning I was left with the pet odor and a slight cigarette odor. The inside of the cabinet and drawers were odor free.
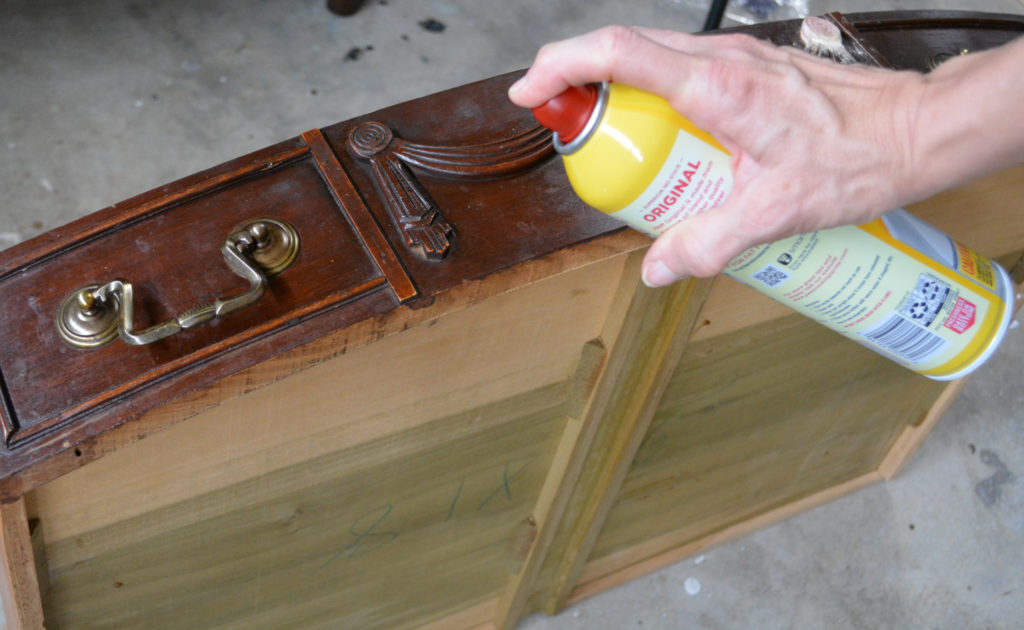
I used furniture stripper and removed the varnish on the area that was “gooey”. Then I put a coat of Kilz original odor blocker on that area.
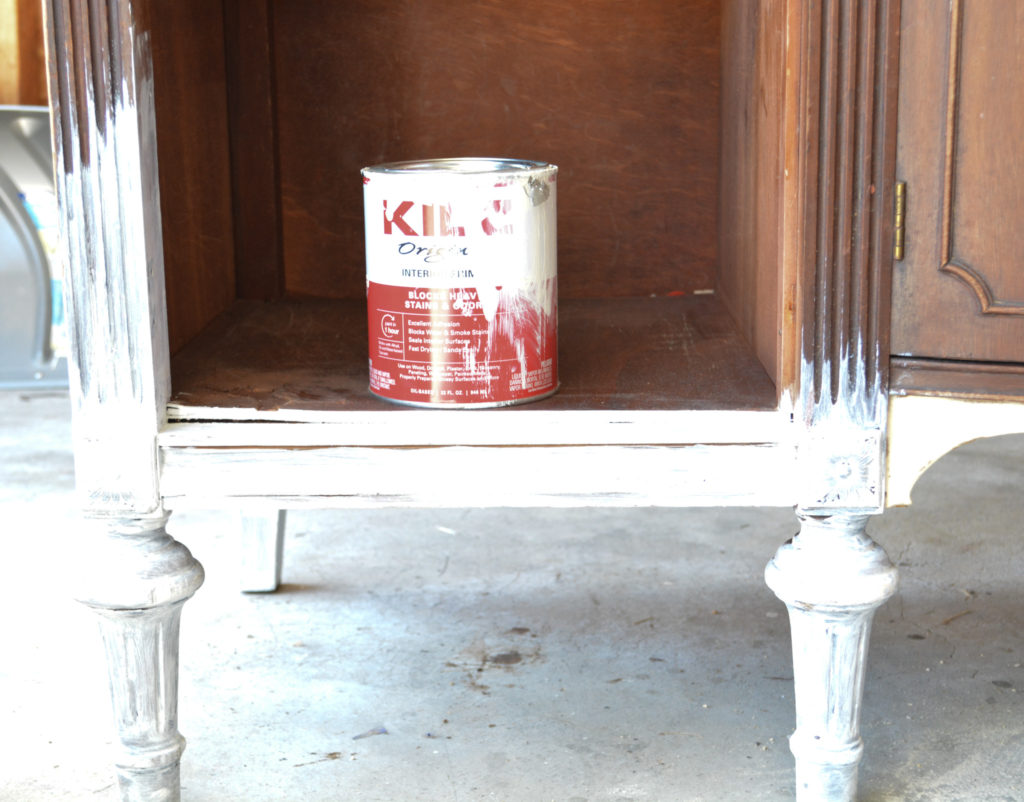
I was going to just paint at this point and hope it covered any cigarette smoke smells, but decided not to risk it.
I sealed the entire piece with Zinnser odor killing primer. It goes on white and dries clear, so I could distress the piece and see wood tones underneath. I would have used this on the whole piece if I hadn’t changed my mind mid project.
Hooray! Odor free and time to paint.
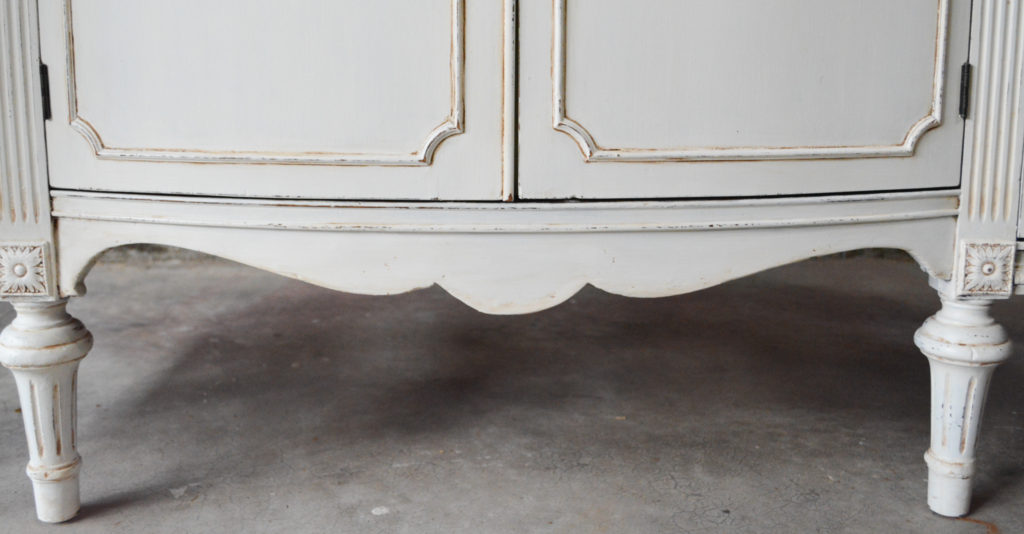
Painting and Finishing
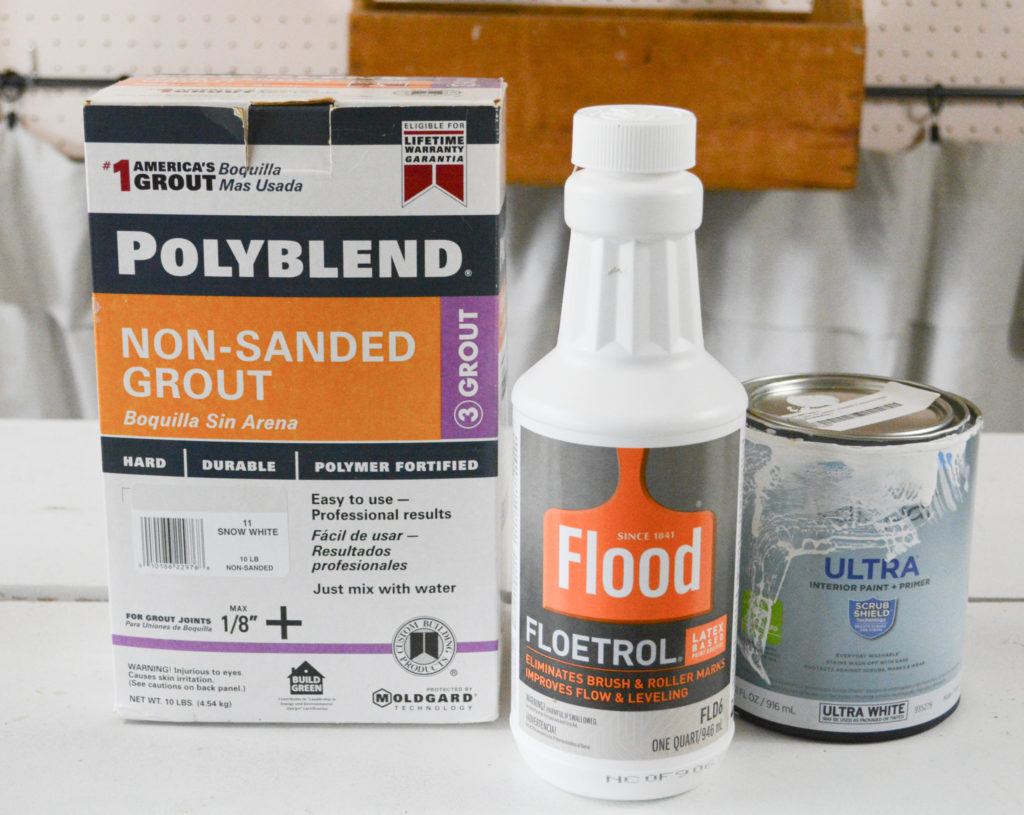
I used my home made chalk paint.
Home Made Chalk Paint Recipe
Mix one cup paint, 1 tablespoon non-sanded grout, and a little water. If mixture starts to get thick, continue adding a little water. I also added Floetrol to help reduce brush marks. I was really happy with the results. The paint color I used was Valspar Fundamental white in a flat finish.
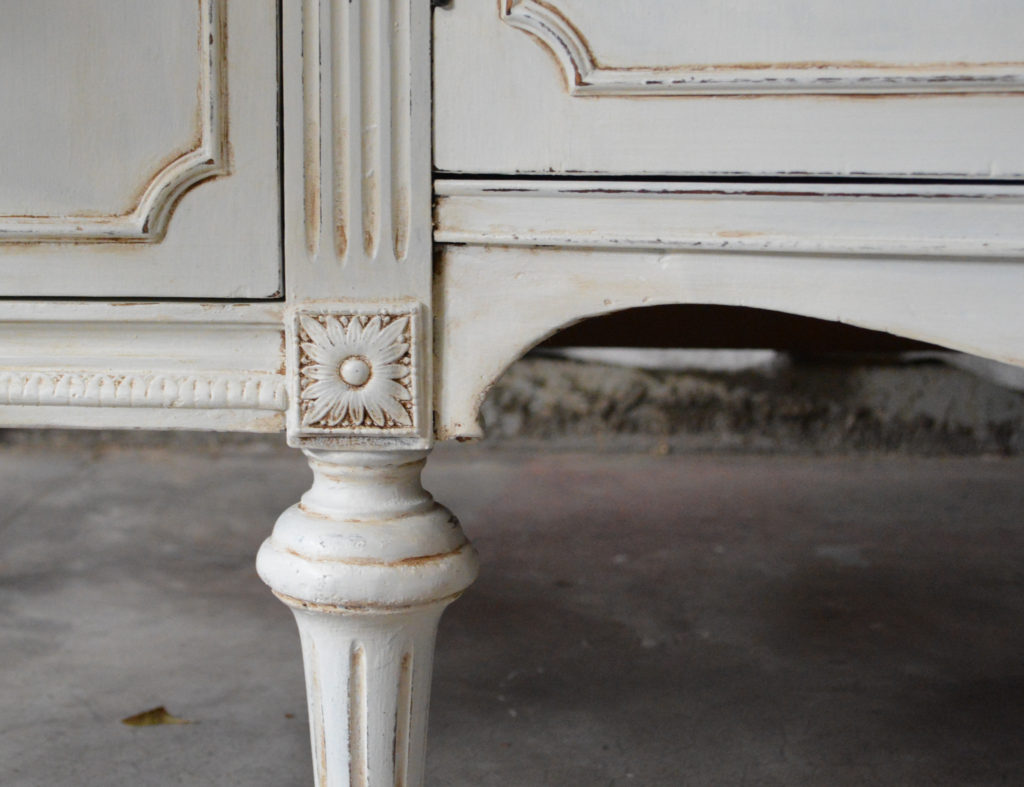
I applied three coats of the chalk paint. After the paint dried, I used a fine grit sandpaper to sand the entire piece and lightly distress the edges.
Adding Wax to Seal and Antique
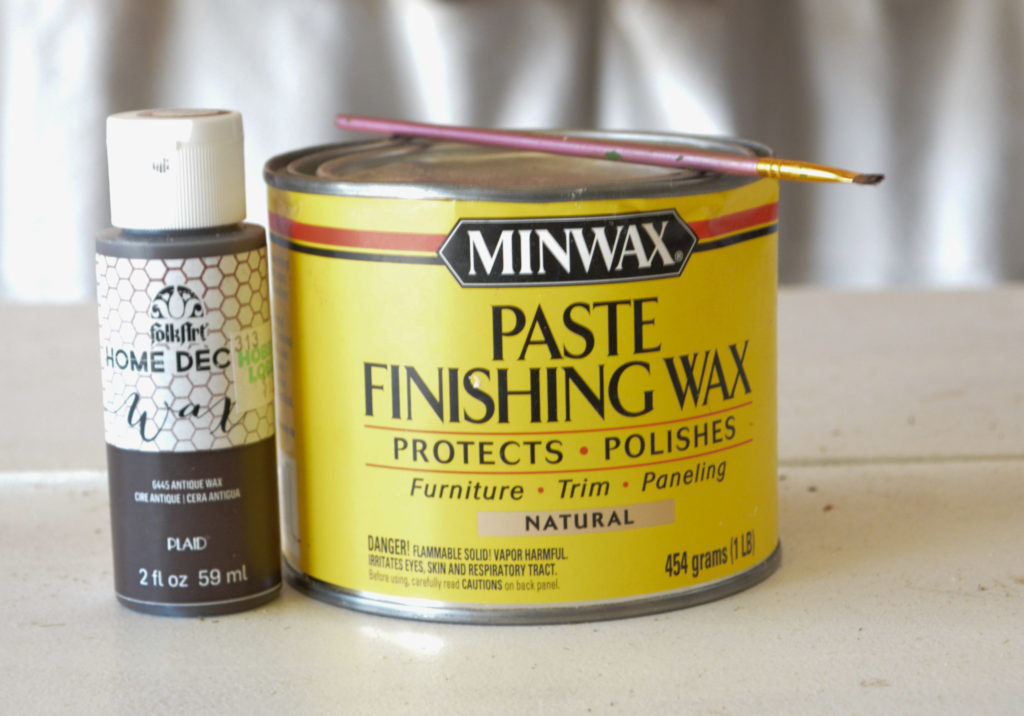
If you use chalk paint it is necessary to seal the piece. My choice is to use wax.
First apply a coat of the clear wax with a cloth. If you are going to add dark wax, do sections at a time. Put on the clear wax, and before it dries, add the dark wax in the areas you want to accent. That way, if you get too much dark wax, wipe it off with the clear wax. It will remove the dark wax before it dries.
Because I’m just a little crazy, I painstakingly added liquid dark wax with a small paint brush to the details and around the doors and drawers. I did not want the white to get darkened at all.
After the wax dries, buff it to a nice smooth finish.
The Hardware – Creating an Antique Brass Finish
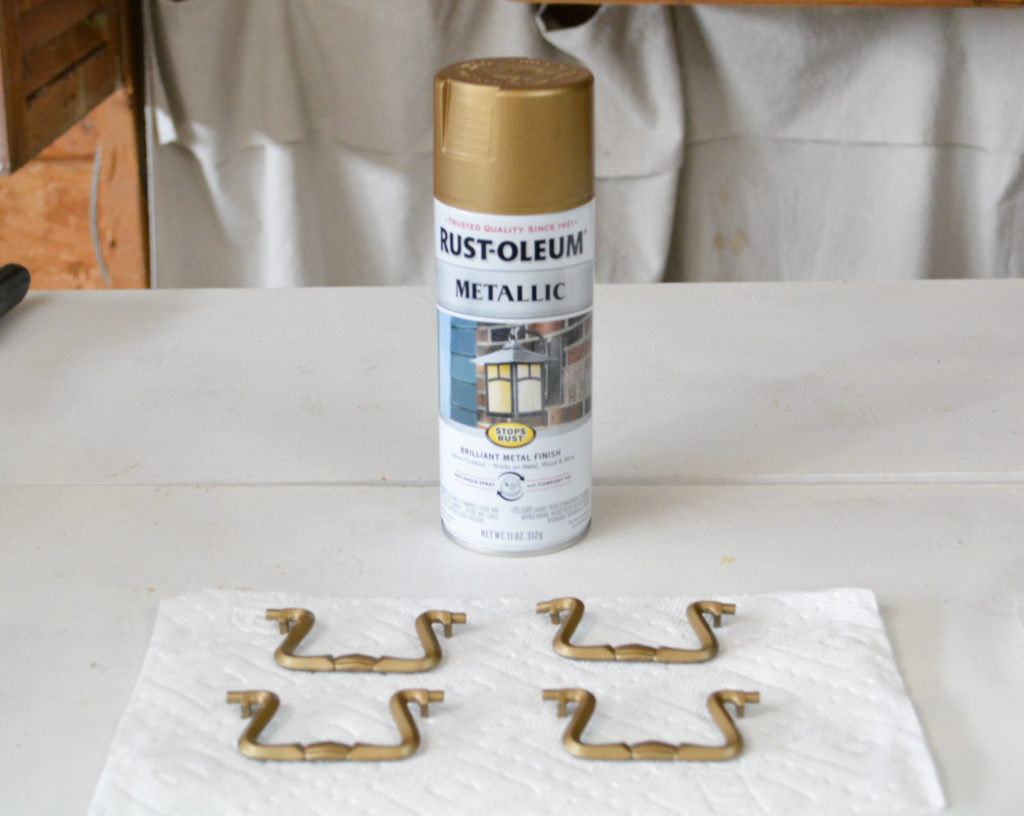
The original hardware was brass. I tried cleaning and polishing it, but it just wasn’t looking pretty. I decided to create my own antique brass finish.
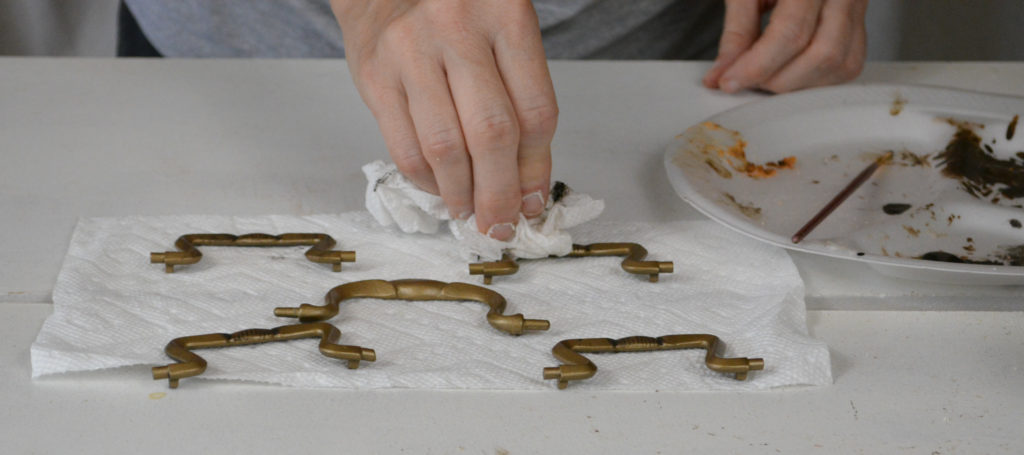
First I spray painted the hardware gold. The color is champagne bronze.
Then I added black paint for an aged look.
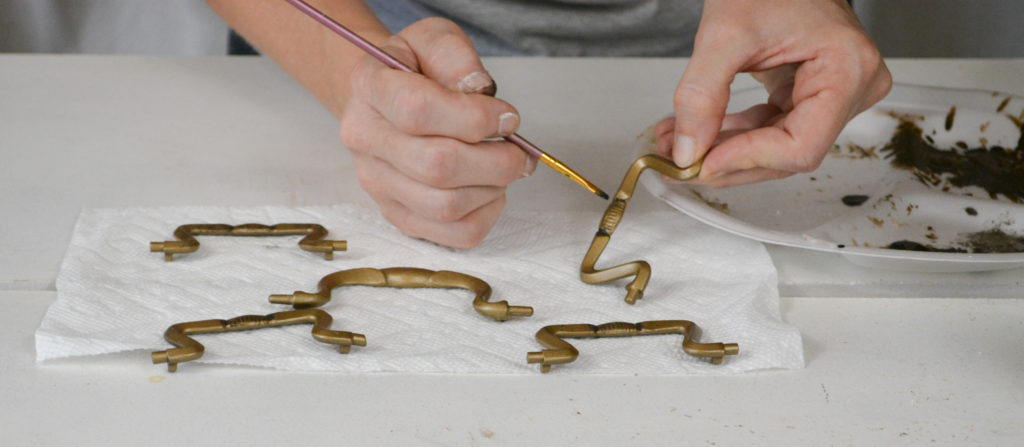
I painted inside all the lines of the details and then wiped off the excess.
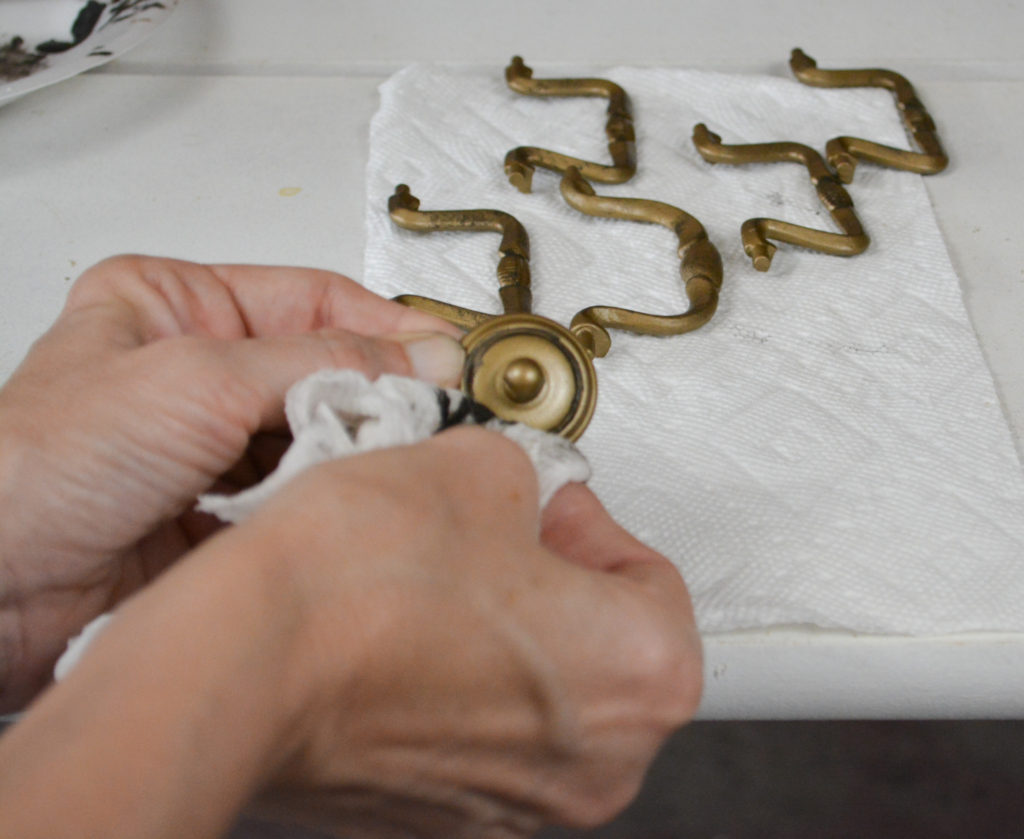
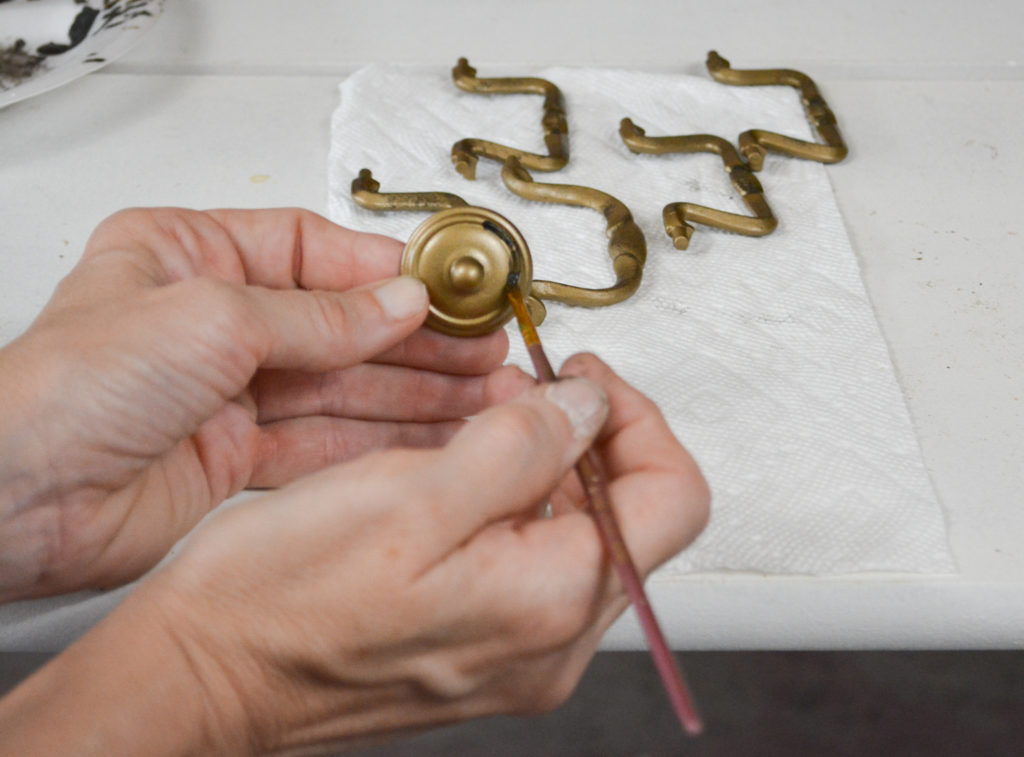
I then scrunched up a paper towel and dabbed it in the black paint, then dabbed the excess on a paper towel. I lightly pounced the paper towel on the hardware for added aging.
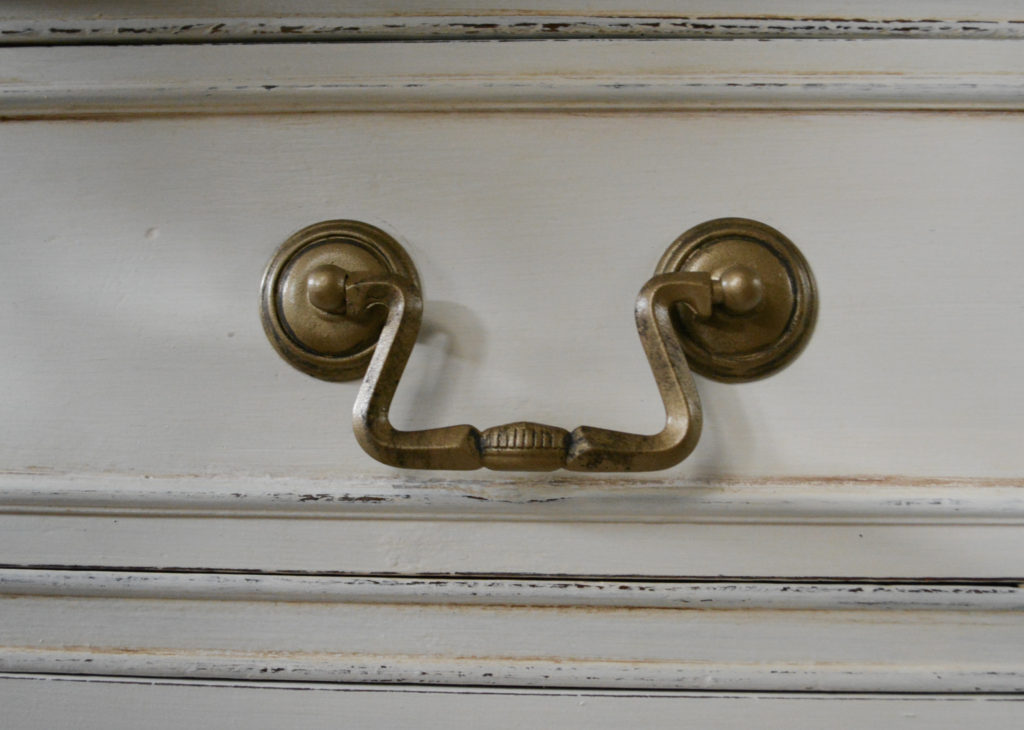
So pretty and fitting with the age of the buffet! I also did this same paint technique on the hinges.
The Makeover Recap
Let’s see…
- Make new appliques for drawer with Bondo
- Repair chewed up leg and missing veneer and applique
- Clean, clean, clean
- Seal the entire buffet for odors
- Three coats of paint
- Sand
- Clear wax and dark wax
- Paint and antique hardware
Done!

And so you know, this has been brought into my house, and it has 100% passed the smell test by the most sensitive nose on the planet! (AKA my son)
Pin It For Later!
Thanks for stopping by,
Janet
You Might Also Like