
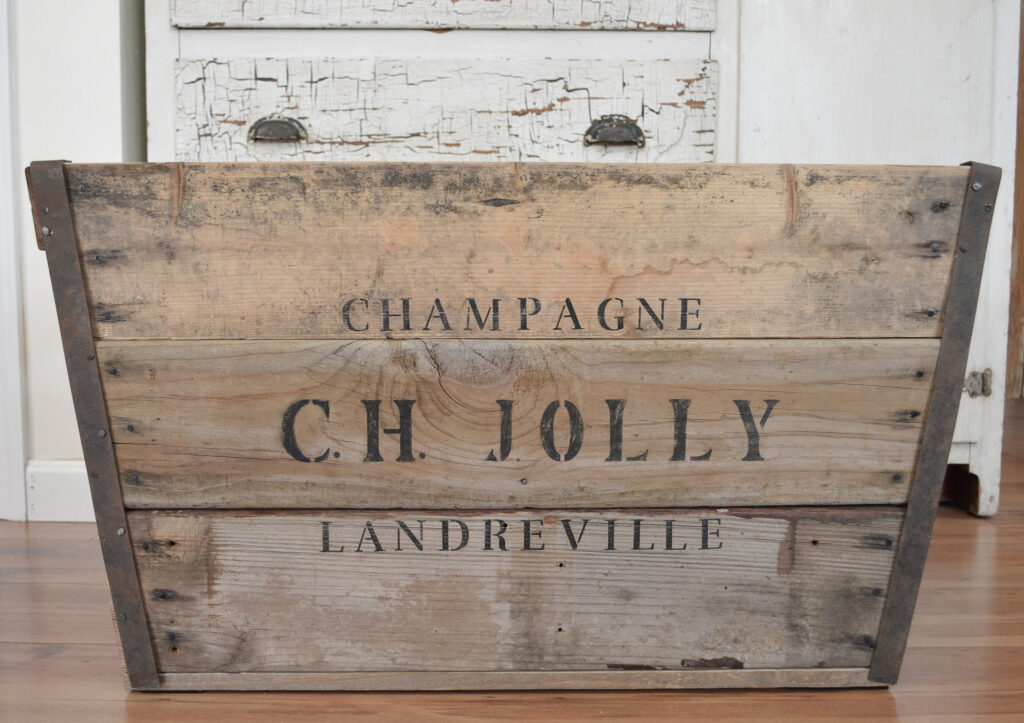
I built a champagne crate! I always wanted a French champagne crate for my Christmas tree, but the prices for an antique one are just not in my budget. And you know how sometimes you envision something, but then it just doesn’t turn out quite like you expected? Well this time it turned out exactly like I hoped, and I am so excited to share it with you! Today I am going to show you how to build a French champagne crate that looks so authentic!
Supplies needed to build a French Champagne Crate
Boards for the front, back, and sides
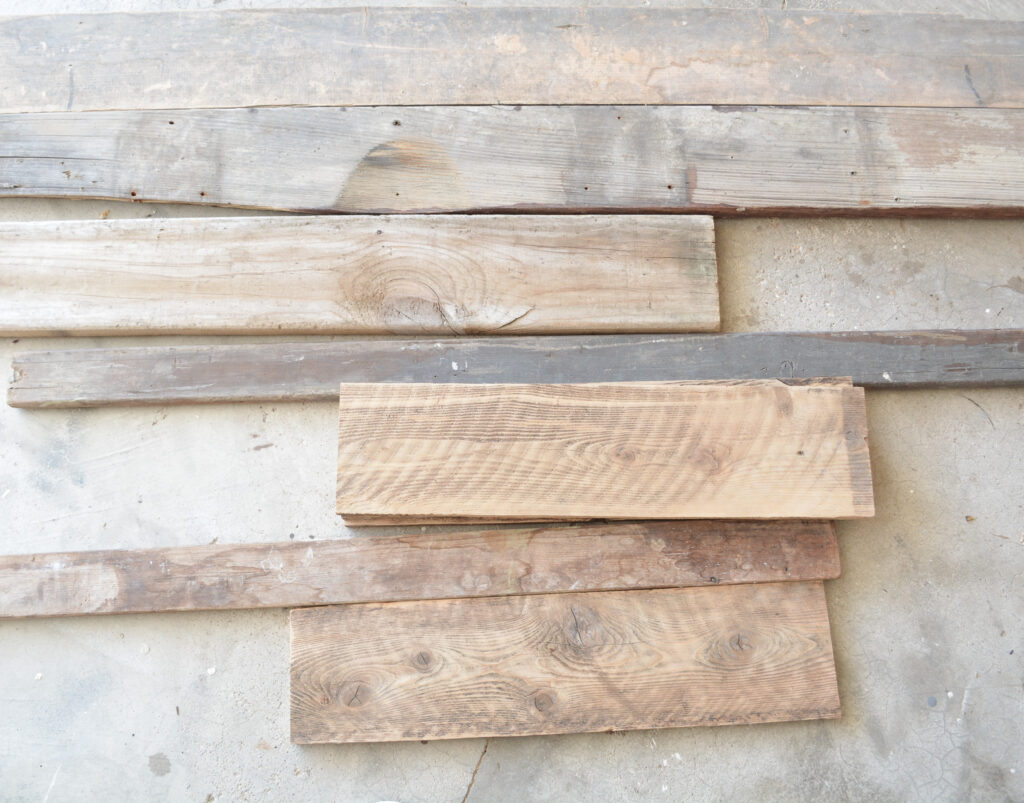
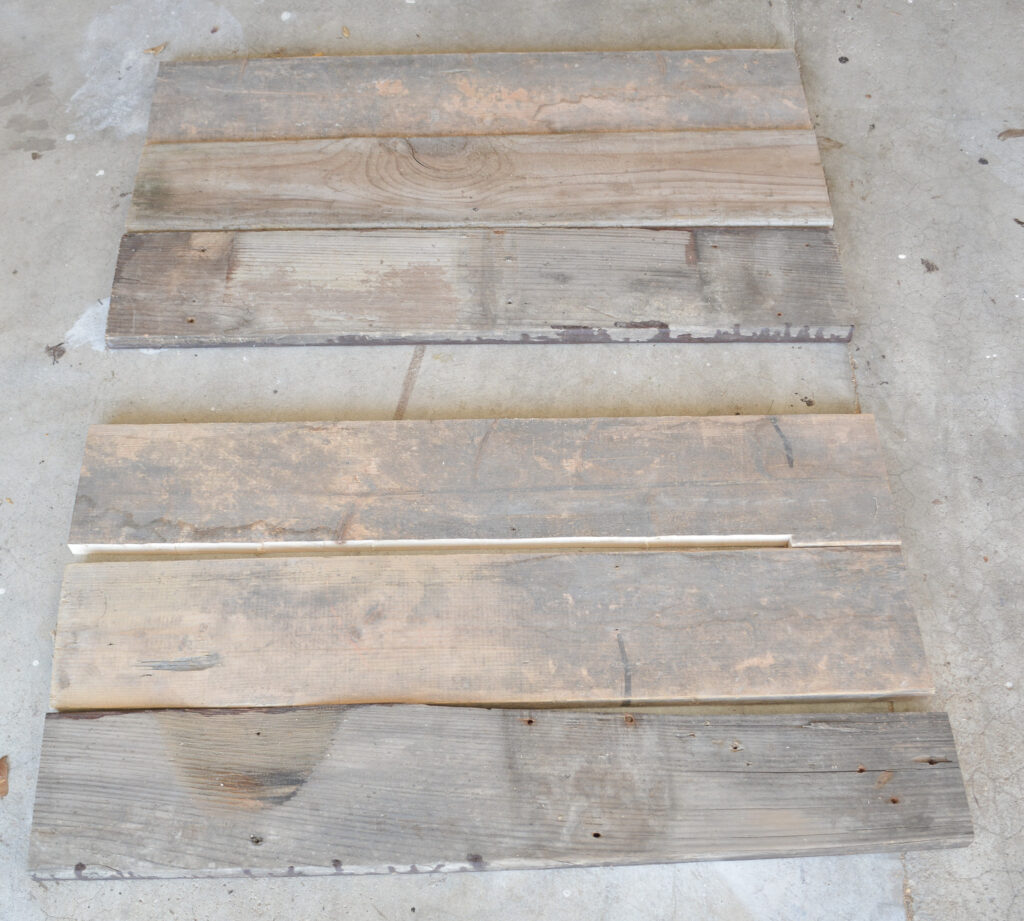
As an avid thrifter, I pick up old pieces of wood at Restore whenever I see them. Even if they are broken, I grab them when I can. At $2.00 a board, you really can’t lose. So these are the old boards I pulled out of my stash to make the champagne crate. If you don’t have a stash of old boards, you can buy some. I used fence pickets for the bottom, and I think they would be a great building option. They are thinner than a normal board, rustic, and very inexpensive.
Four pieces of a 1×2 cut 1-2 inches shorter than the height of the crate
Boards for the bottom – I used 4 pieces of pine fence pickets
Wood Glue – use it on all joins
Metal Strip – found in the hardware section of the home improvement store
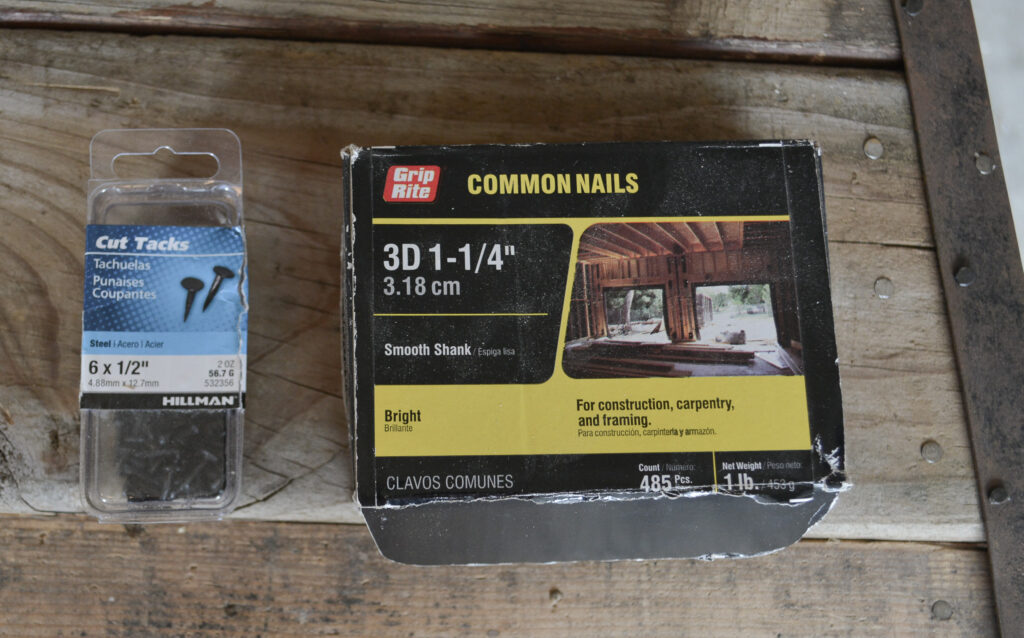
Nails – 1 1/4″ common nails
You can use a nail gun, but I prefer the authentic look you get with a hammer and nails
Tacks for the metal strips
This post contains affiliate links, which means I make a small commission at no extra cost to you. See my full disclosure here.
Tools
Saw
Hammer
Drill with metal drill bit
Optional Finishing Supplies
Wood Stain
Black paint
Stencils
Paint for rust effect or rust paint kit
Cut the Boards to Size
My inspiration crate was 29″ wide, 21″ deep, and 15″ high, so I tried to get as close to that size using the boards I had.
Cut 6 – 6 inch boards 29″ long for the front and back.
Cut 6 – 6 inch boards 21″ long for the sides.
Boards for the bottom cut to your finished size depending on the type of boards used to build the crate.
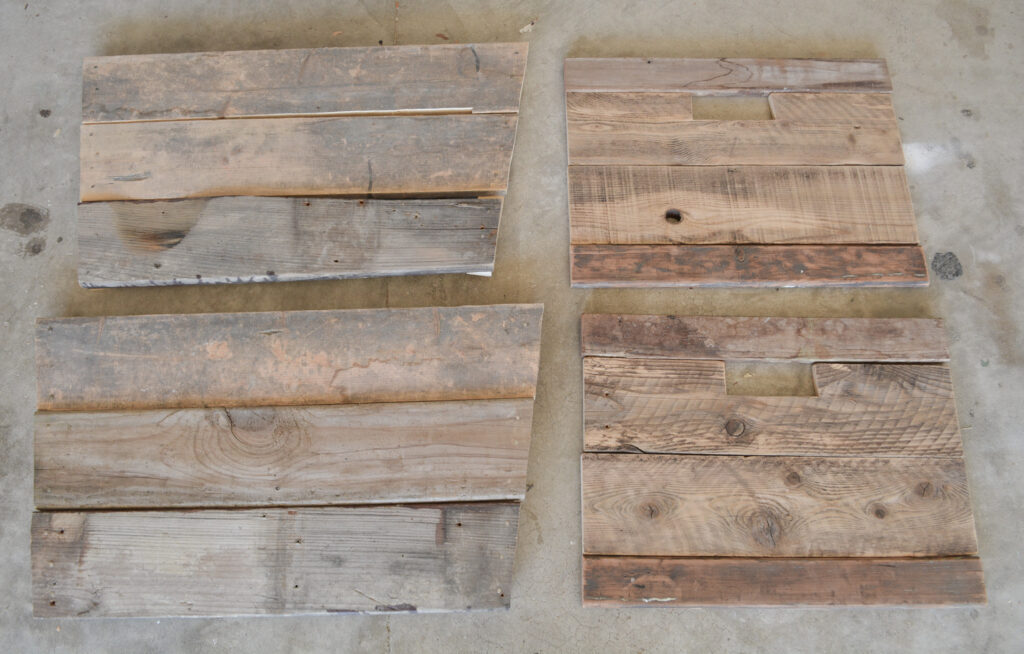
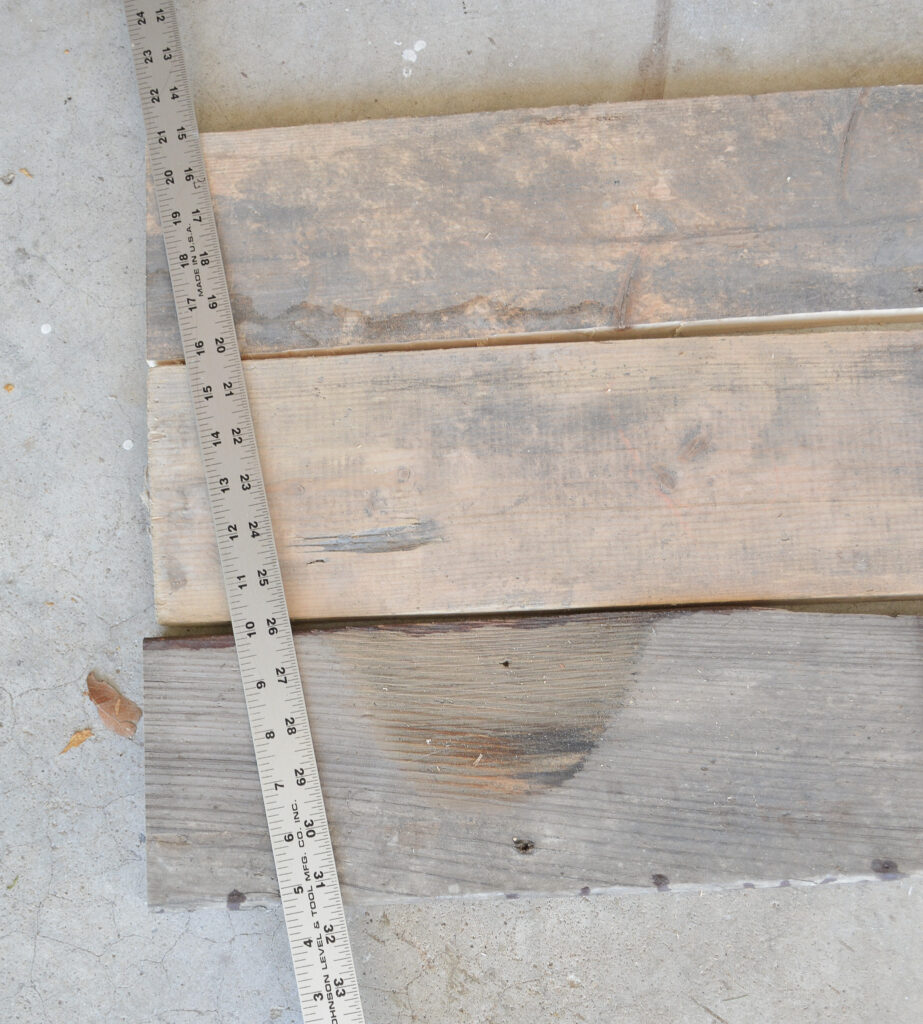
You will notice that I used 4 boards for each of my sides. That was the only way I could get the right measurements with the reclaimed boards. If you had all the same width boards, you would just cut three.
How to Create a Tapered Side For a Champagne Crate
What makes a champagne crate different from other crates is the tapered sides. It is smaller on the bottom and gets wider at the top. Here is how I created the tapered side.
Disclaimer: I didn’t do any fancy geometry or any kind of angle measurements to create this crate, HaHa!
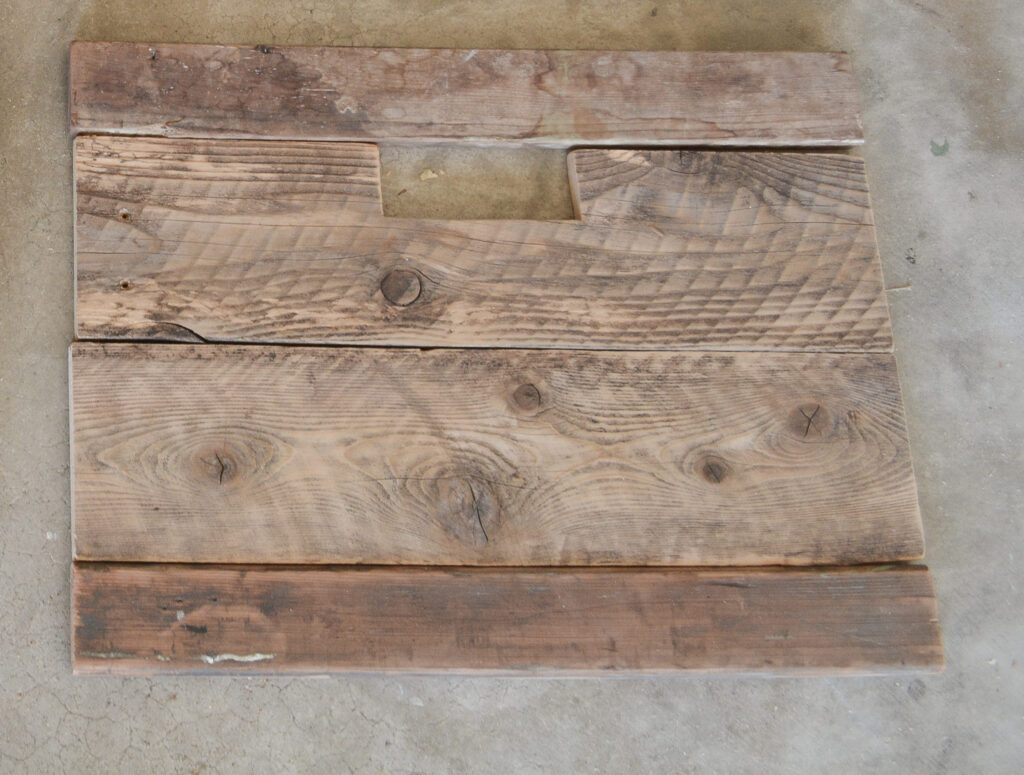
1.Lay out the three boards for the front, long edges touching, side edges even
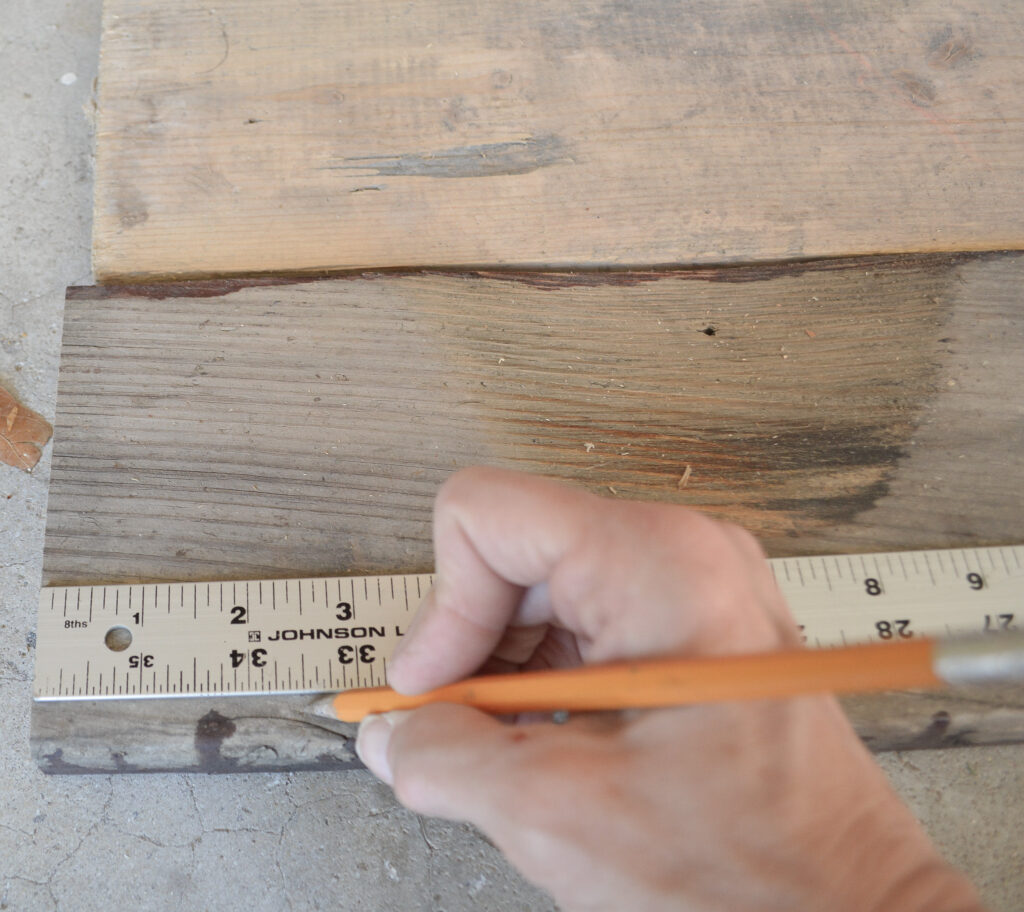
2. On the bottom board, measure in 2 1/2 inches and mark
3. Lay a straight edge from the mark to the top board edge and draw a line
4. Tape along the line for easier cutting (optional)
5. Cut each board individually with a jigsaw along the marked line
When you put the boards back together, you have a taper.
Repeat for the back side.
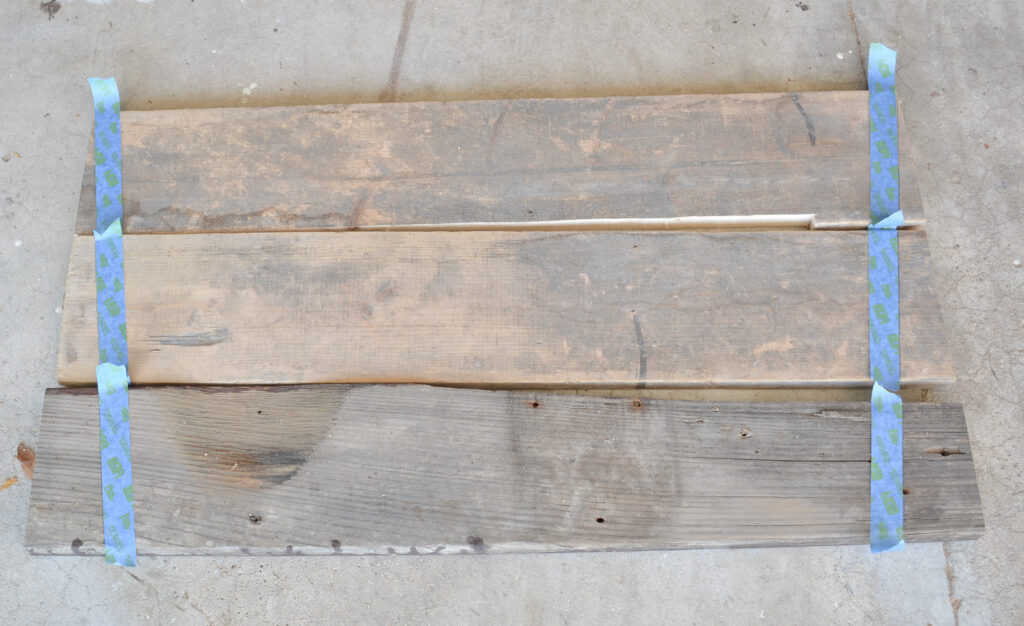
Attach the Front Boards Together
I used the 1×2 boards on the back to hold the boards together. Again, I didn’t bother cutting the ends at an angle, so the boards are cut shorter than the sides. Do a dry fit before attaching the boards to make sure they don’t stick out of the top. Nail on the front side.
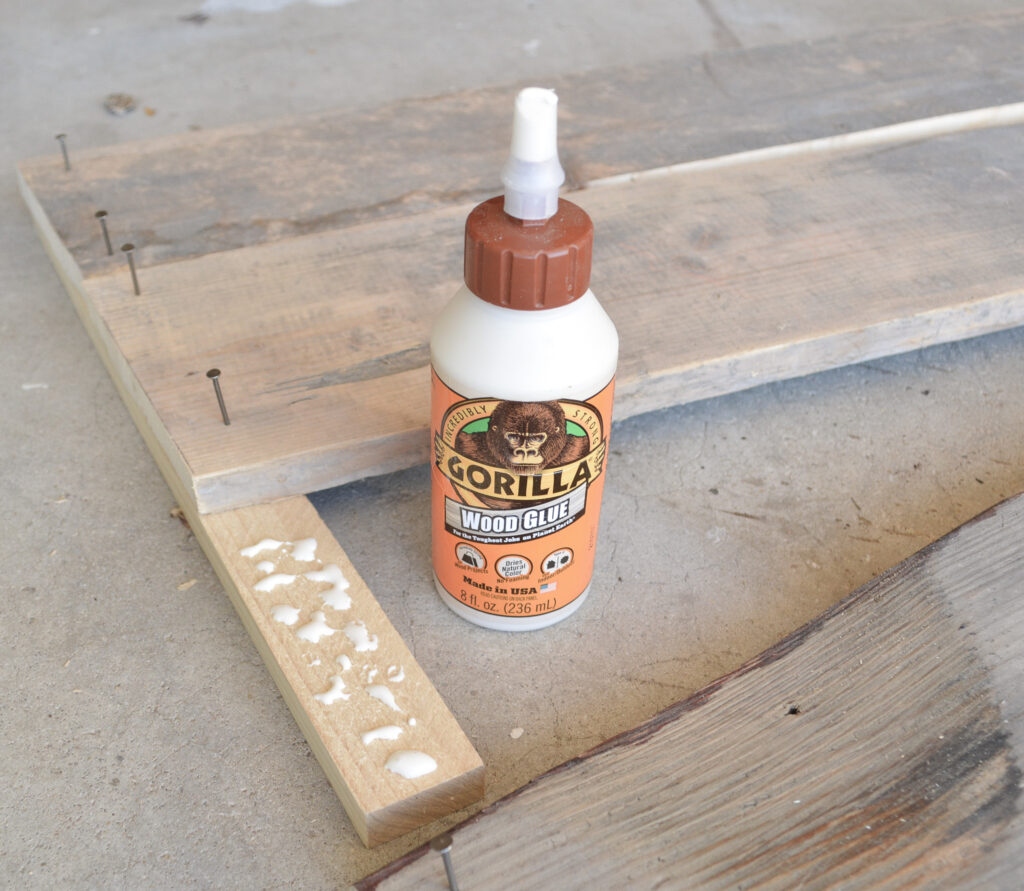
And don’t forget the glue.
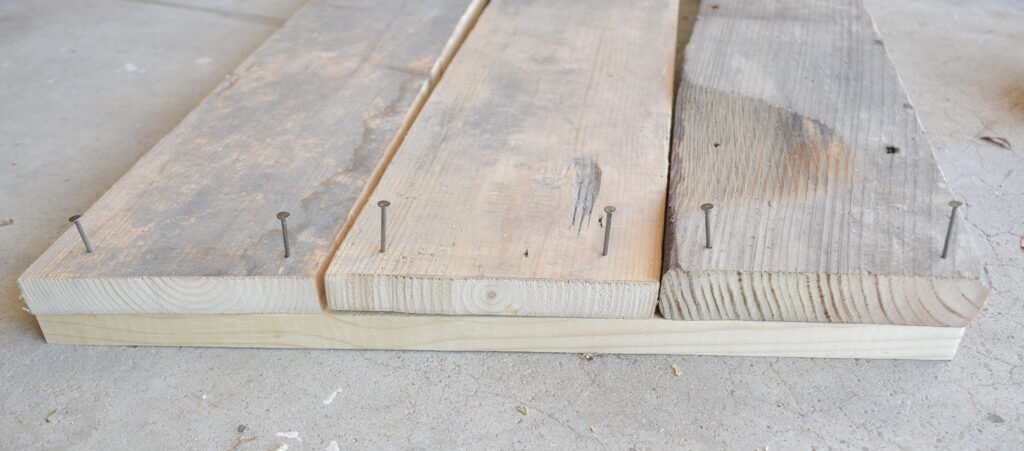
Do this for all four sides of the front and back pieces.
Prepare the Sides of the Crate
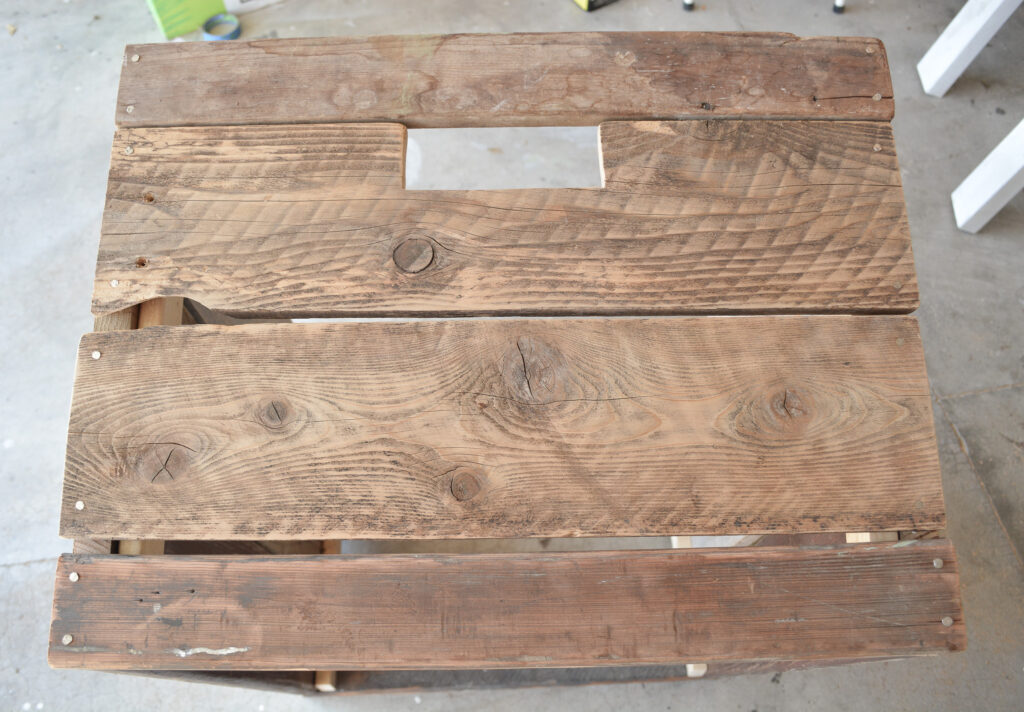
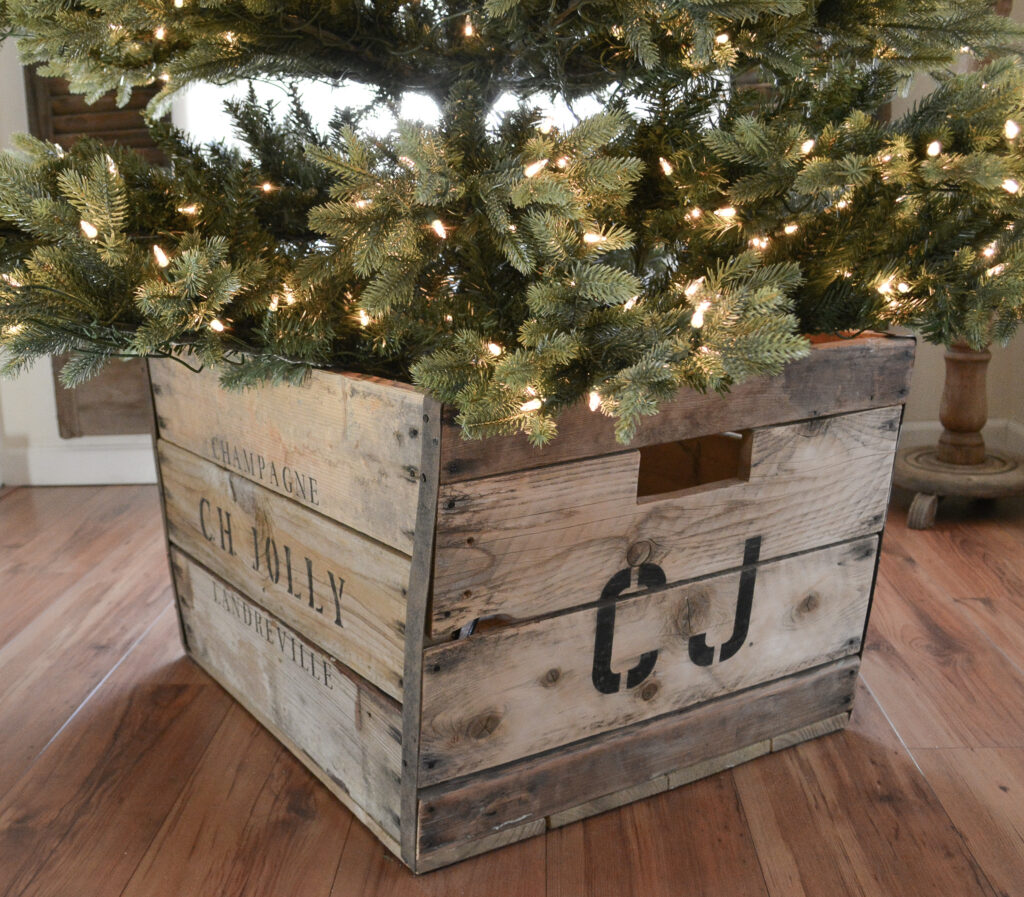
A champagne crate needs handles on the sides, so I cut some with a jigsaw.
The way I made the handle was a little sneaky. Because I had the small board on top, I only cut the second piece.
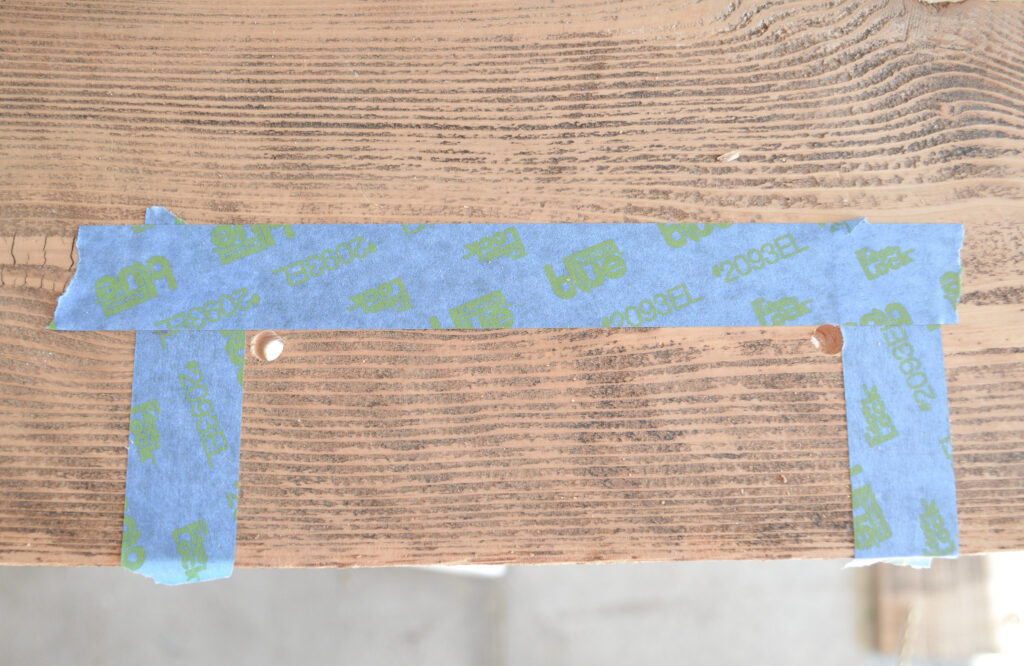
I marked where I wanted the handle, drilled holes for the corners so I could turn the jigsaw, and then cut it out. And actually, you only need to drill a hole in one corner.
How to Assemble the crate

These are what the four sides looked like before I put them together.
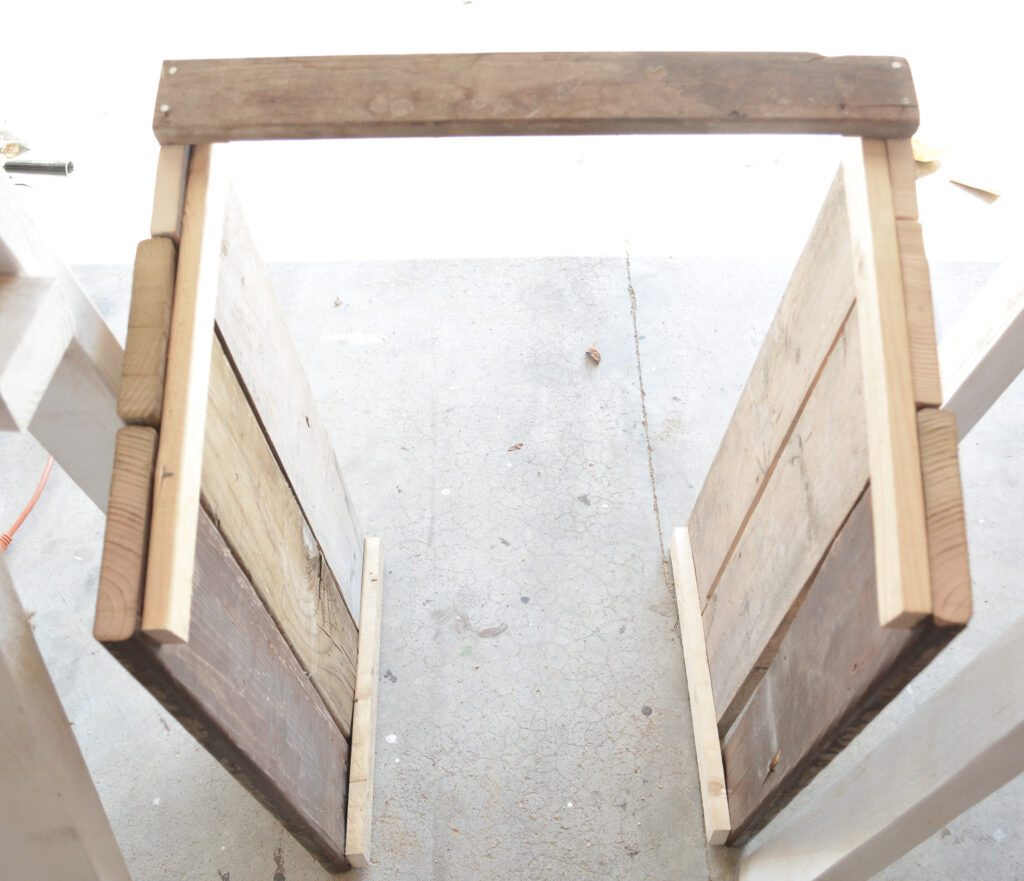
Propping up the front and back, I nailed on the top and bottom piece of the side. The nails went into the side of the boards, not the 1×2.
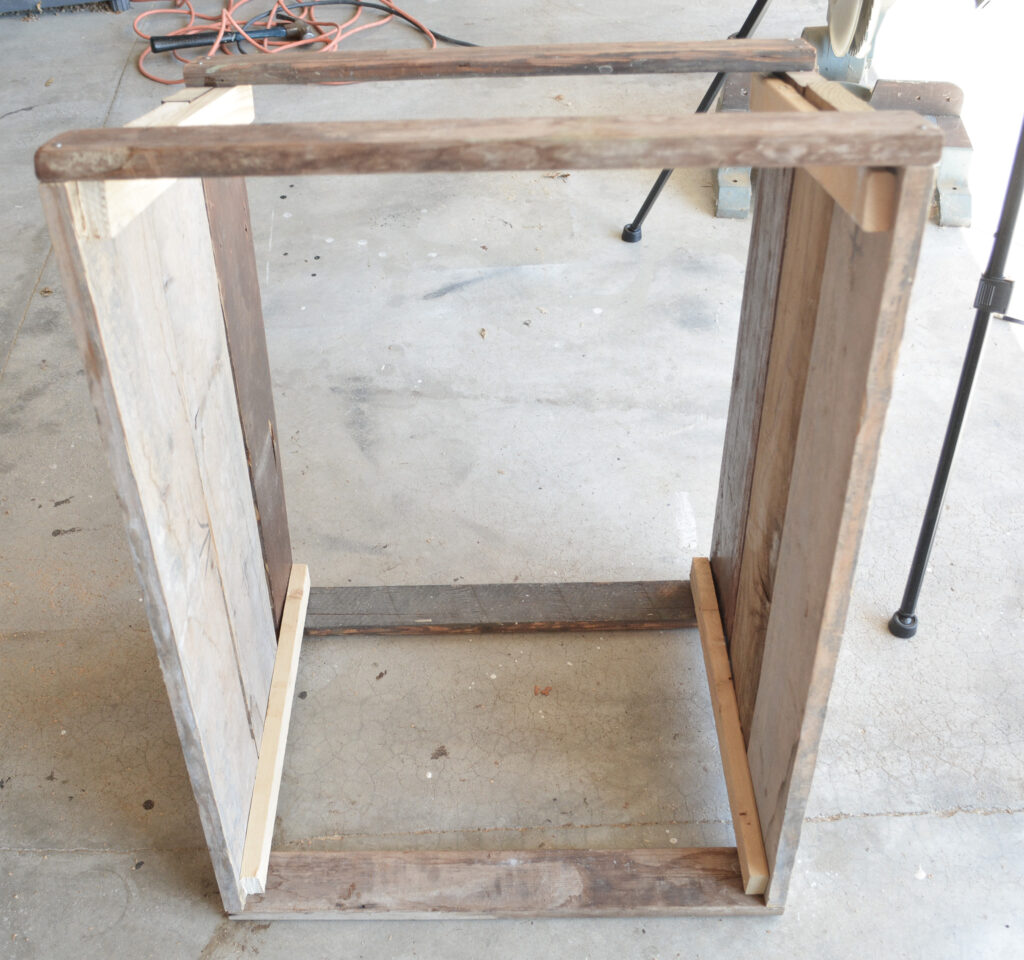
I turned it over and did the other side. This held everything in place so I could fill in the rest of the side pieces.
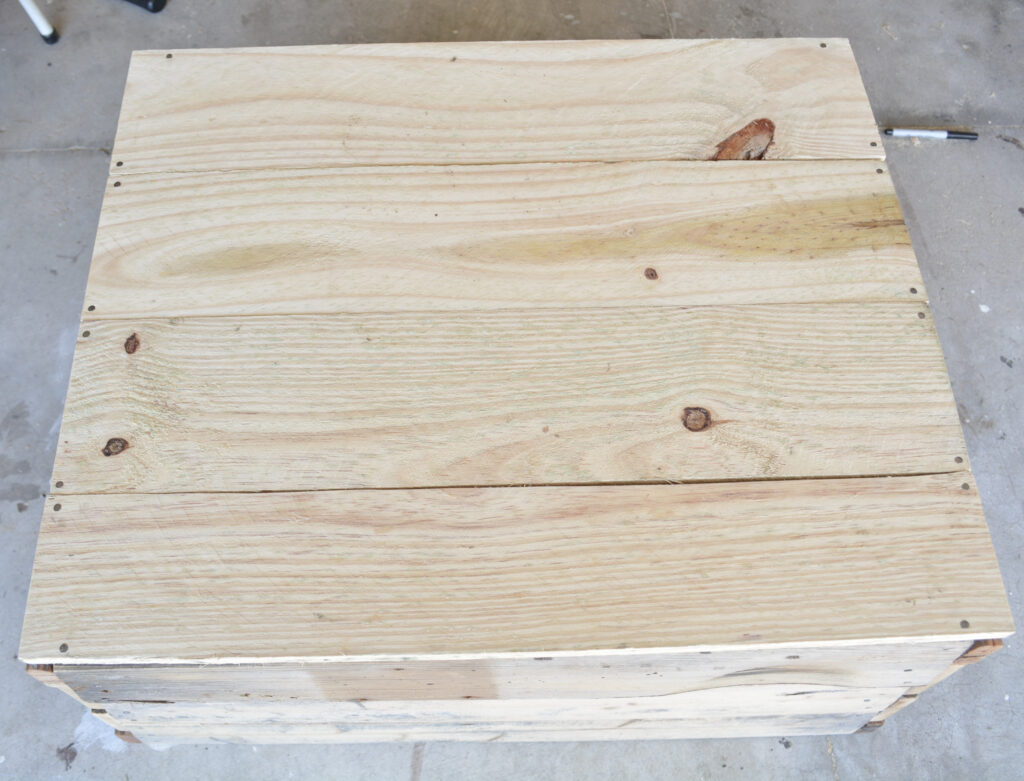
Add the Bottom To the Champagne Crate
I didn’t have enough old wood for the bottom, so I used fence pickets. I did have to cut the width of one board down with my jigsaw to get the right size. The boards were nailed around the edges.
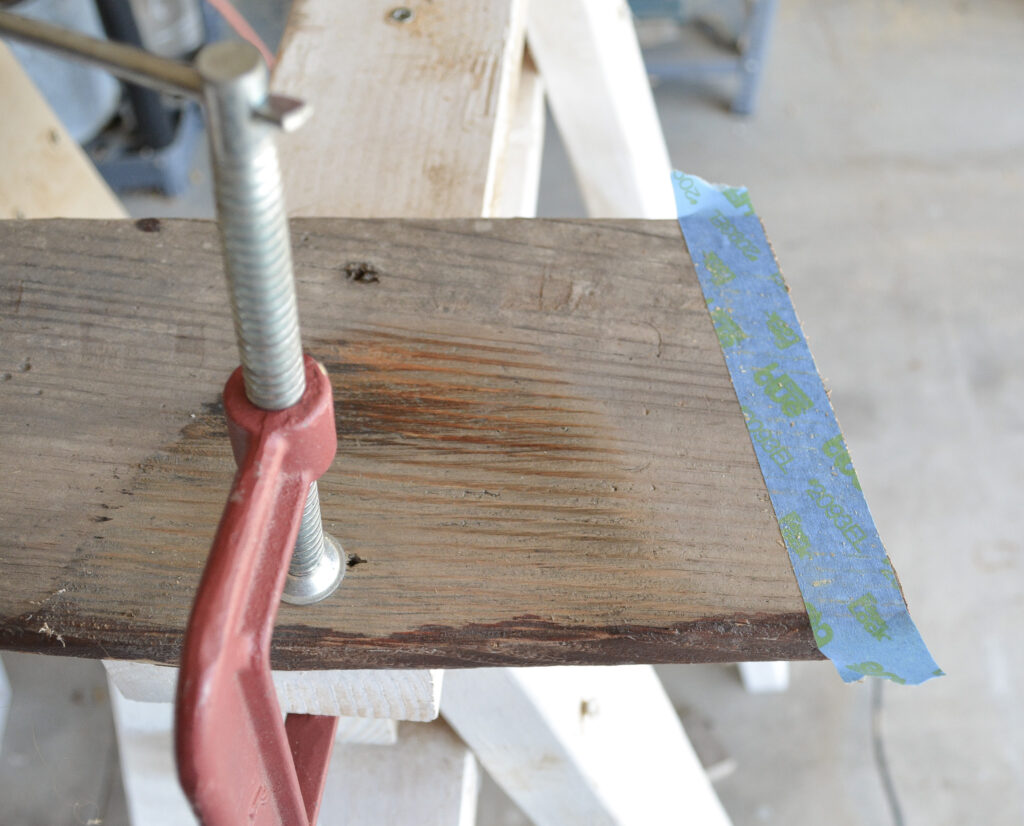
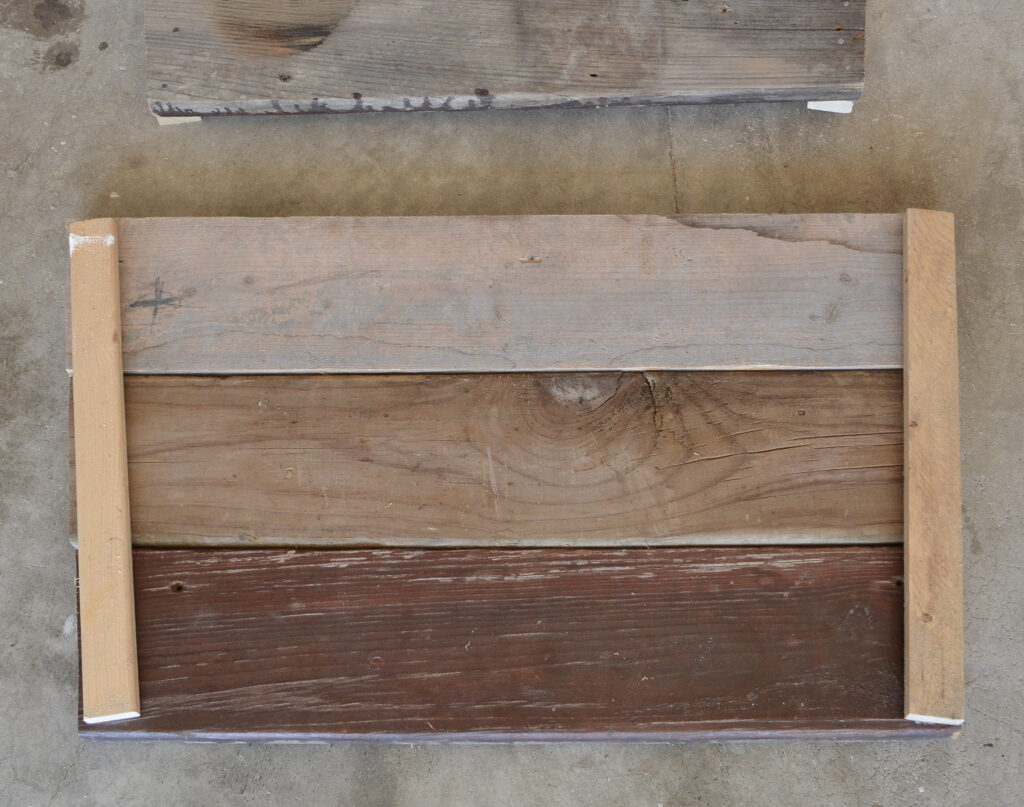
At this point, I tried to blend all the different woods together. The bottom was stained, the old boards were scrubbed, and I sanded some boards to make them closer to the same color.
Here is a look at the pine fence picket bottom stained in Minwax special walnut. I think it looks great, and would work to build the whole crate.
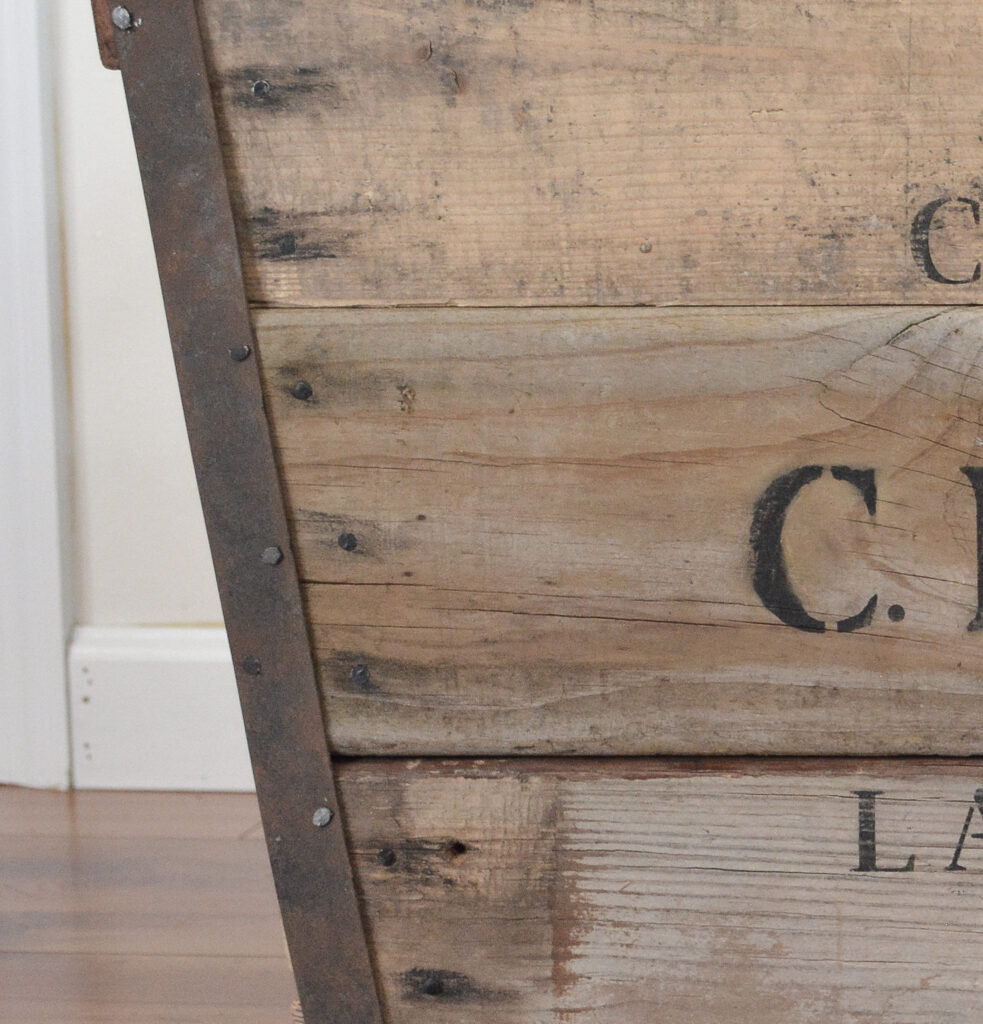
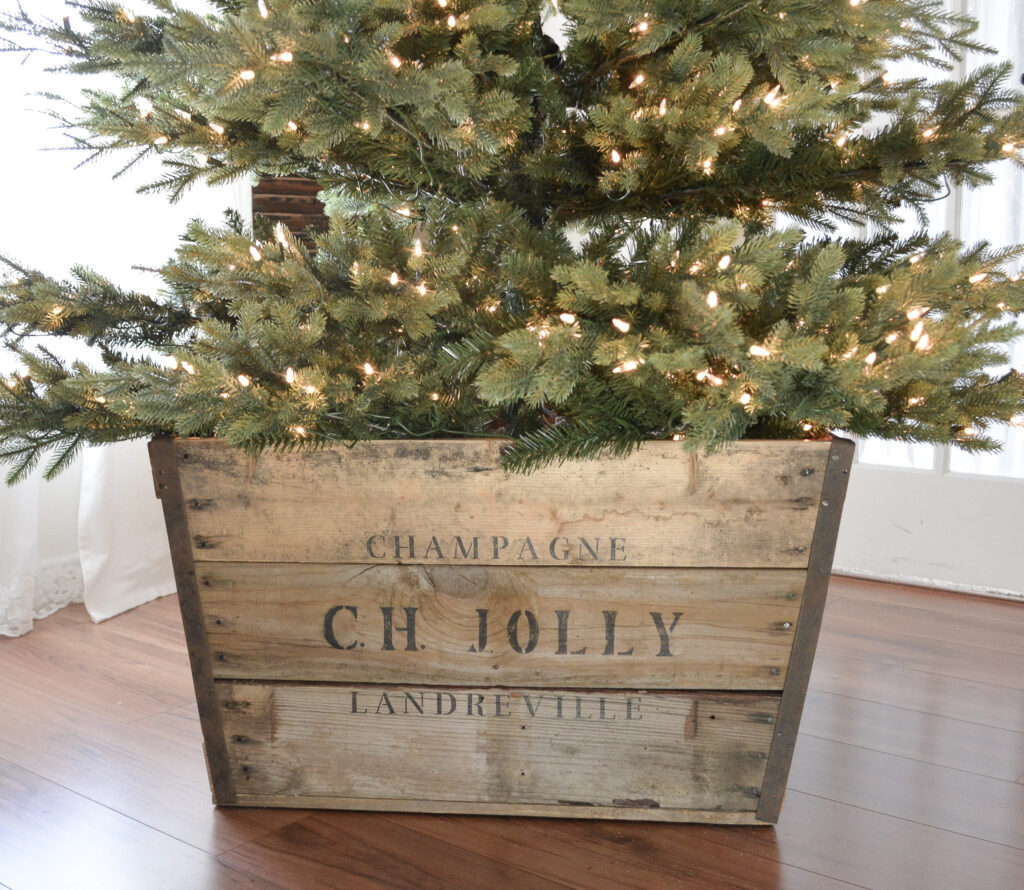
Add the Metal Strip
My boards were different thicknesses and the edge just looked a little off to me. A lot of crates have a metal strap or a corner brace, so I used that to make the edge look better.
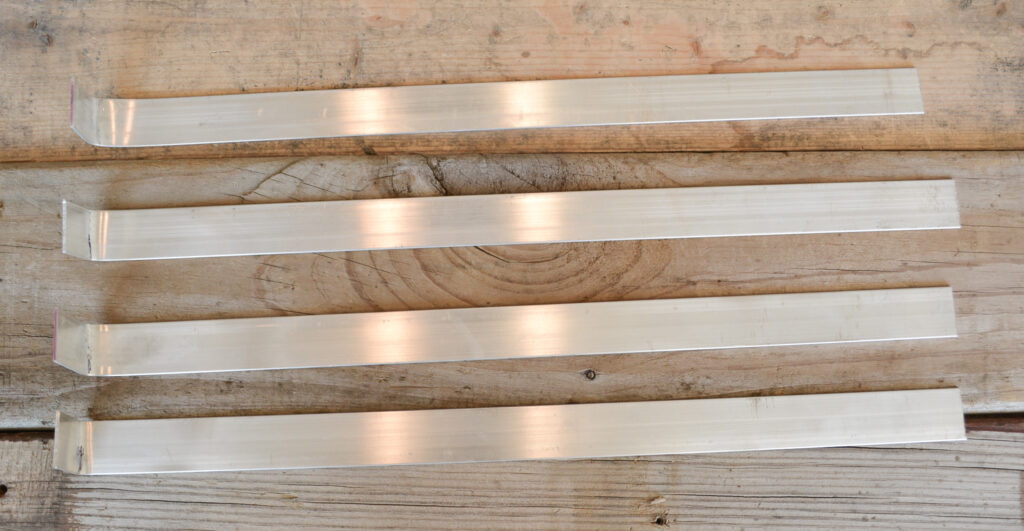
I found this metal strip in the hardware department at Lowe’s. It was one long piece and I just cut it with a hacksaw in my miter box. I cut them a little longer than the height of the crate.

The end was bent to go over the top before it was attached to the wood.
I spray painted the strips oil rubbed bronze and gave them a painted rust look like I did with my drawer hardware. The only difference was I used a rag to pounce on the paint instead of brushing it on. I would love to have used this rusting kit that Natalie at My vintage porch shares in a post on how she rusted hardware, but I didn’t want to wait for delivery.
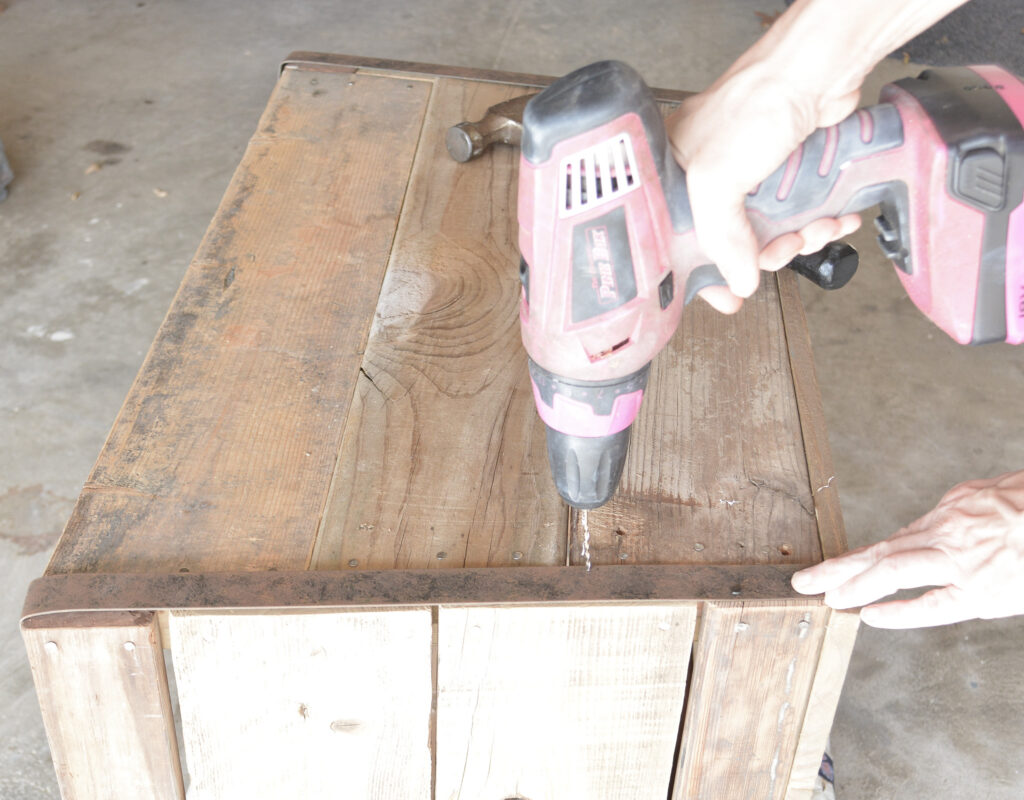
Using a metal drill bit, holes were drilled in the metal for tacks and nails.
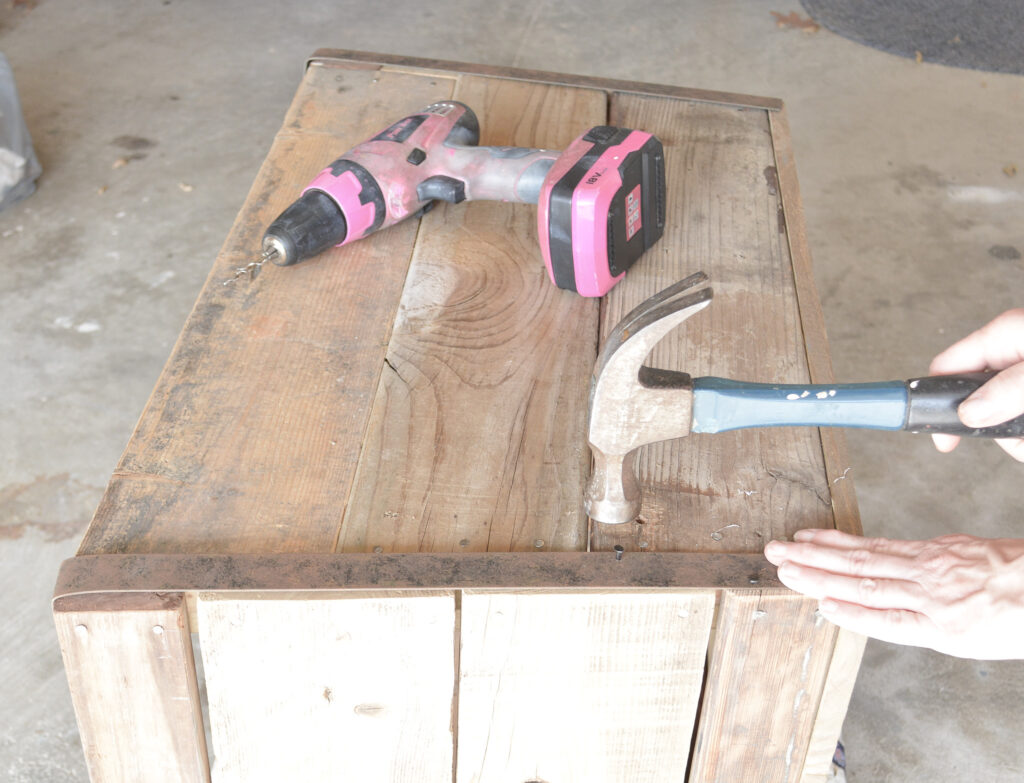
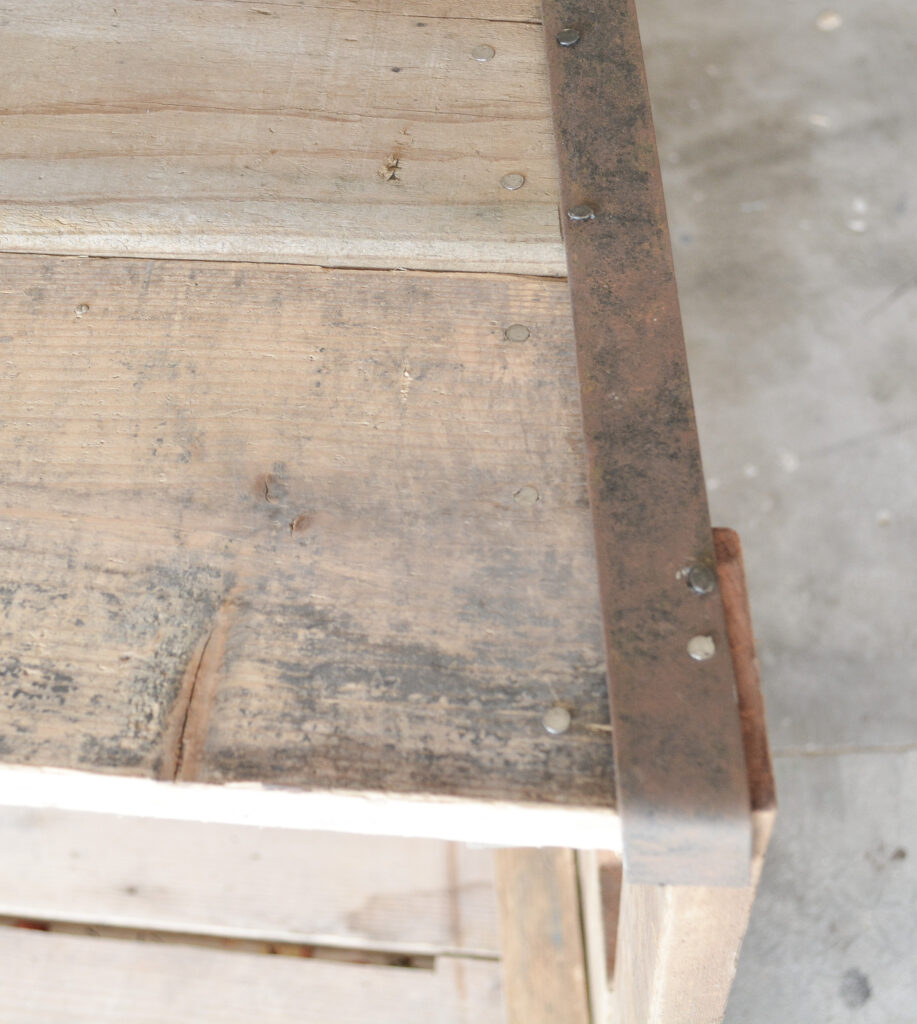
Tacks were used on the thin part of the wood, but I used nails on the areas that were over the board ends. This held the strip more securely.
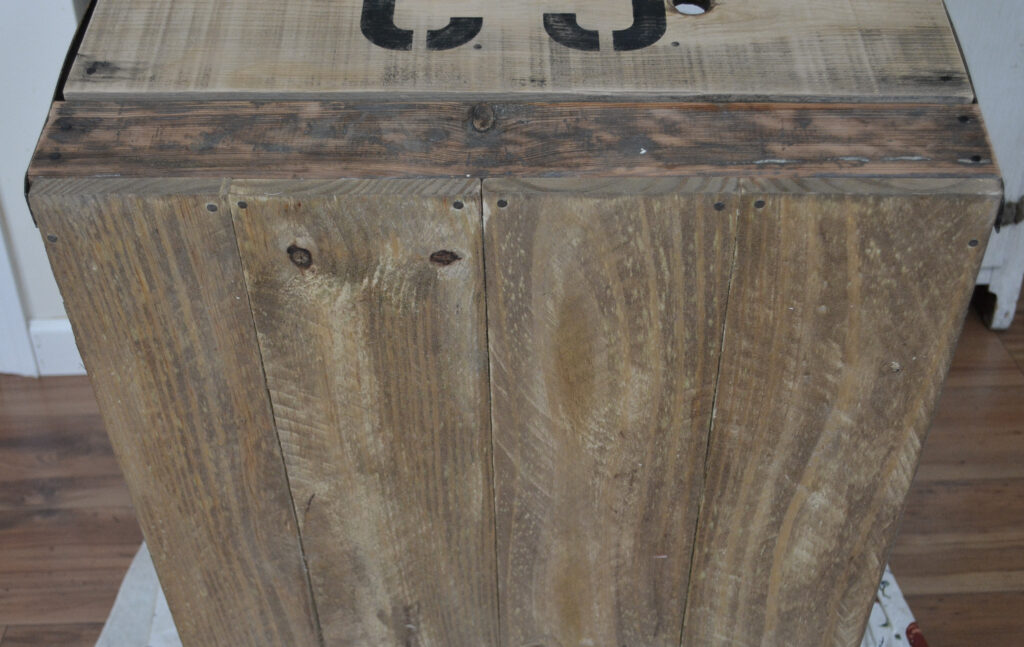
The Finishing Details
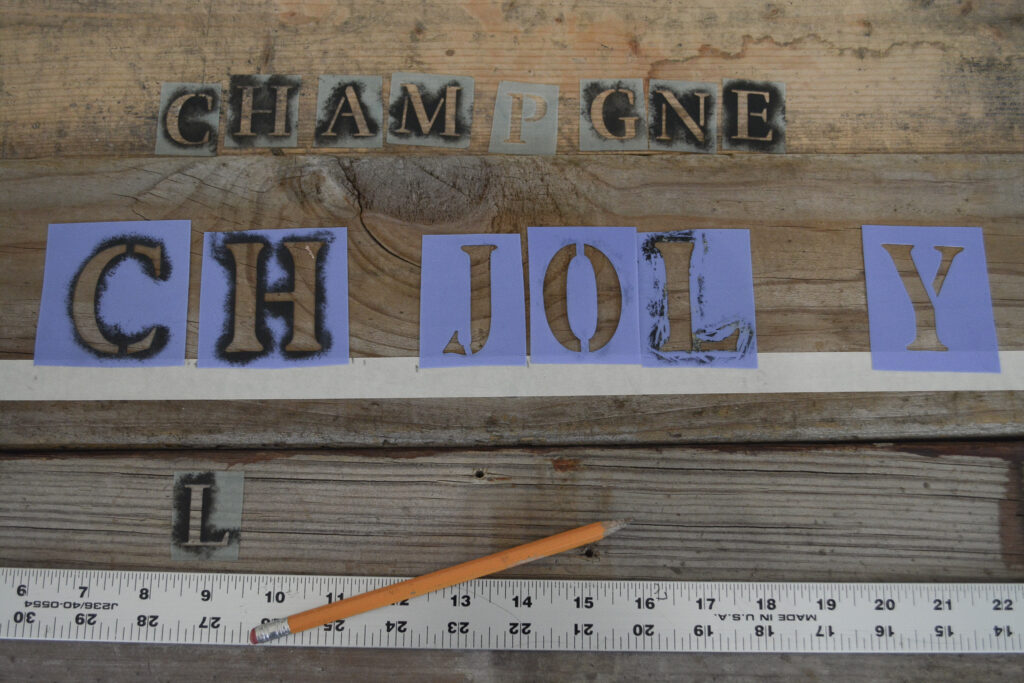
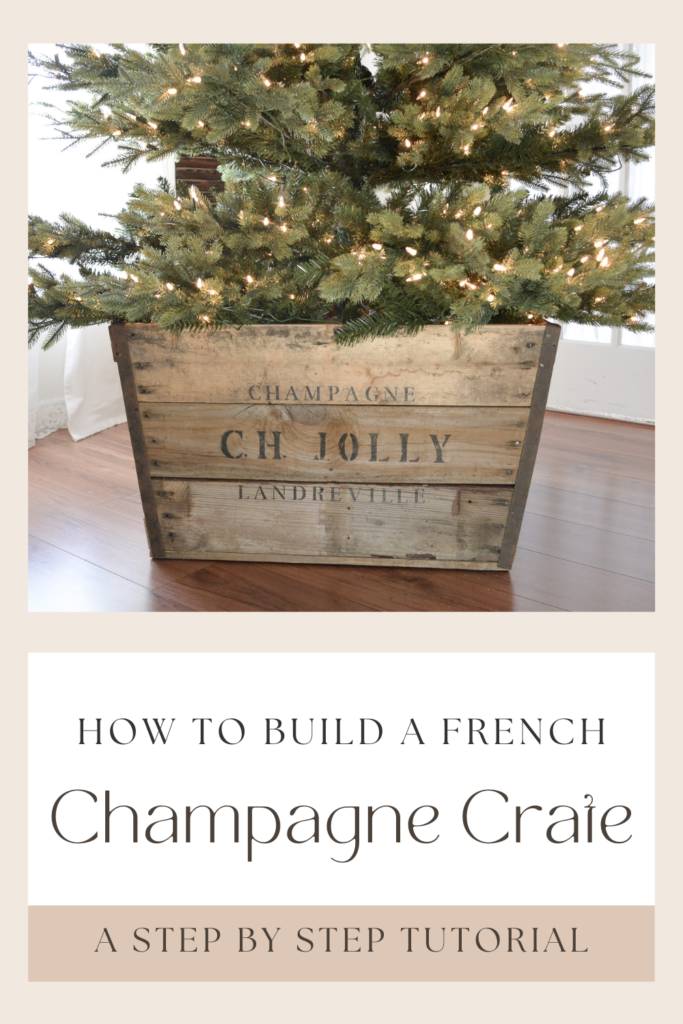
Using black paint and stencils, I added the supplier name and area the champagne crate might have come from. These are 1 inch and 2 inch stencils.
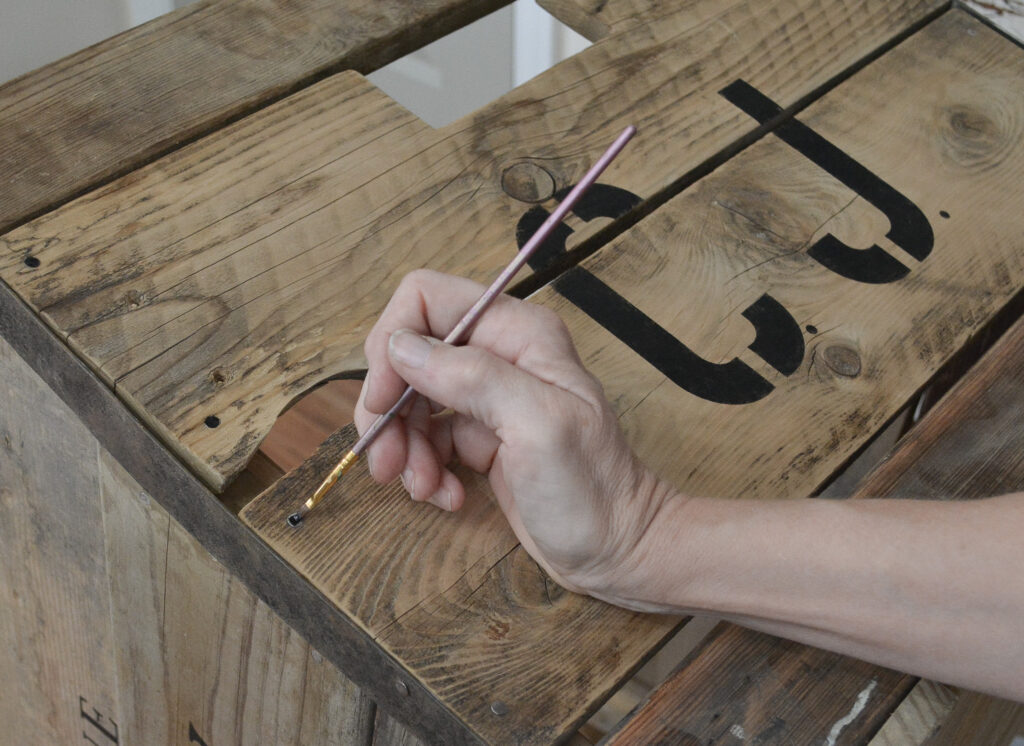
To age the nails, use a small paint brush and add black paint.
After the nails dry, smudge a little more black paint in the nail area. This gives the appearance of rust coming off the nails, or dirt in the holes? I don’t really know, but all the old wood pieces seem to look like that.
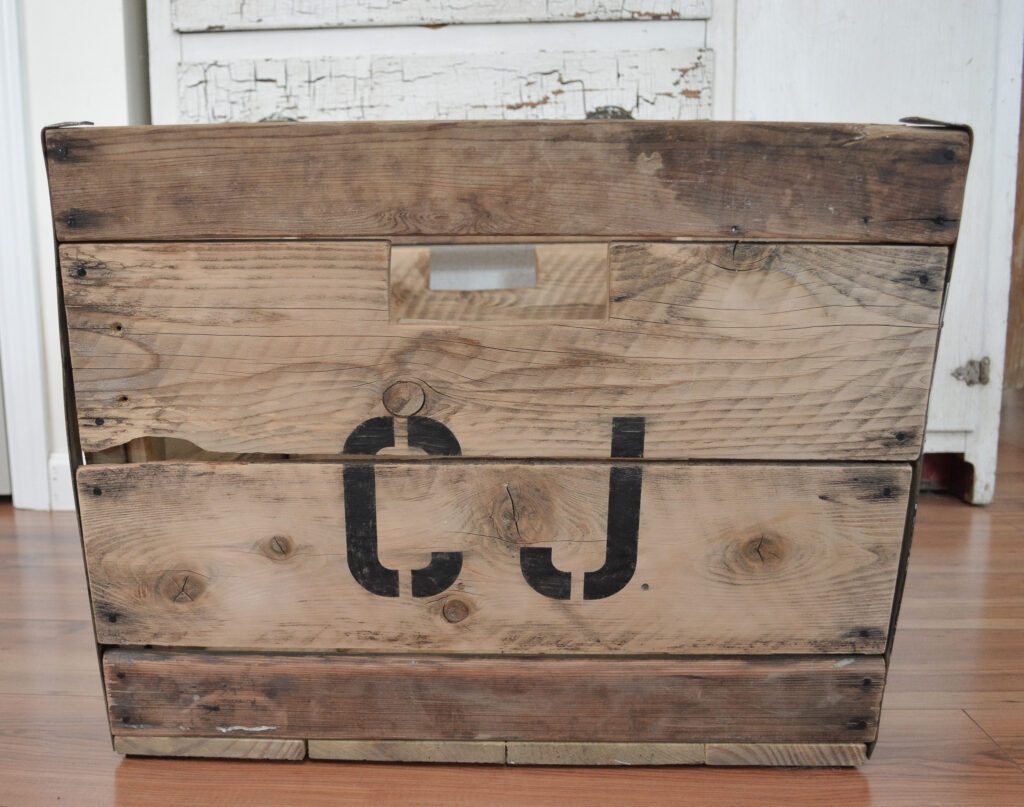
The side also got stenciled with initials.
Placing the Christmas Tree in the Champagne Crate
I built this crate for my Christmas tree, so I did make sure it was big enough for the tree stand. It turned out a little too tall though, so I had to find a way to raise the tree stand.
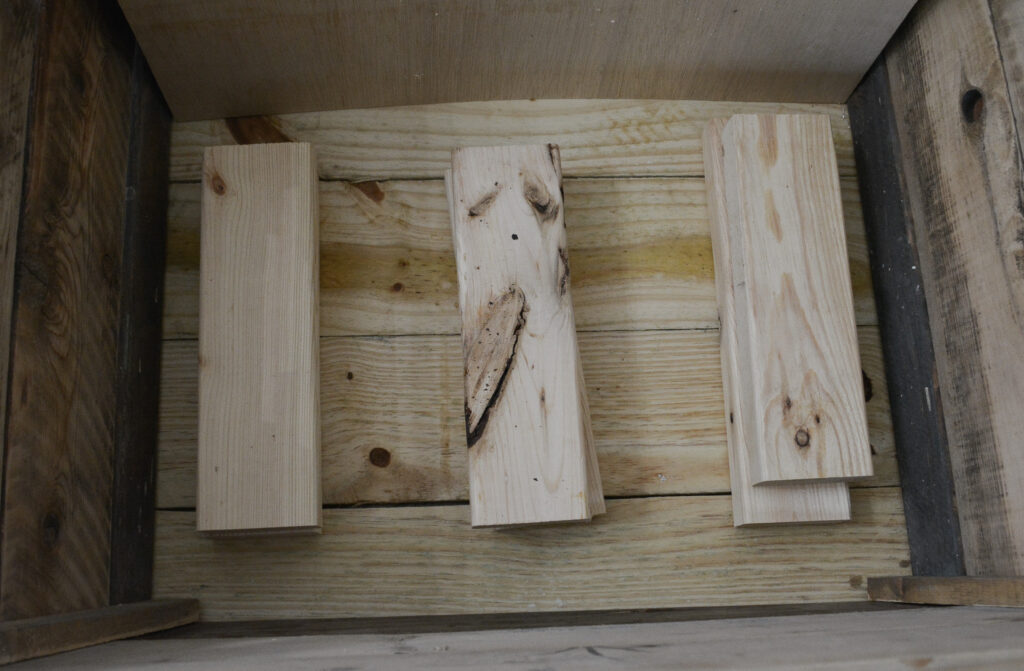
Nothing fancy, I just added a couple of stacks of scrap 2x4s
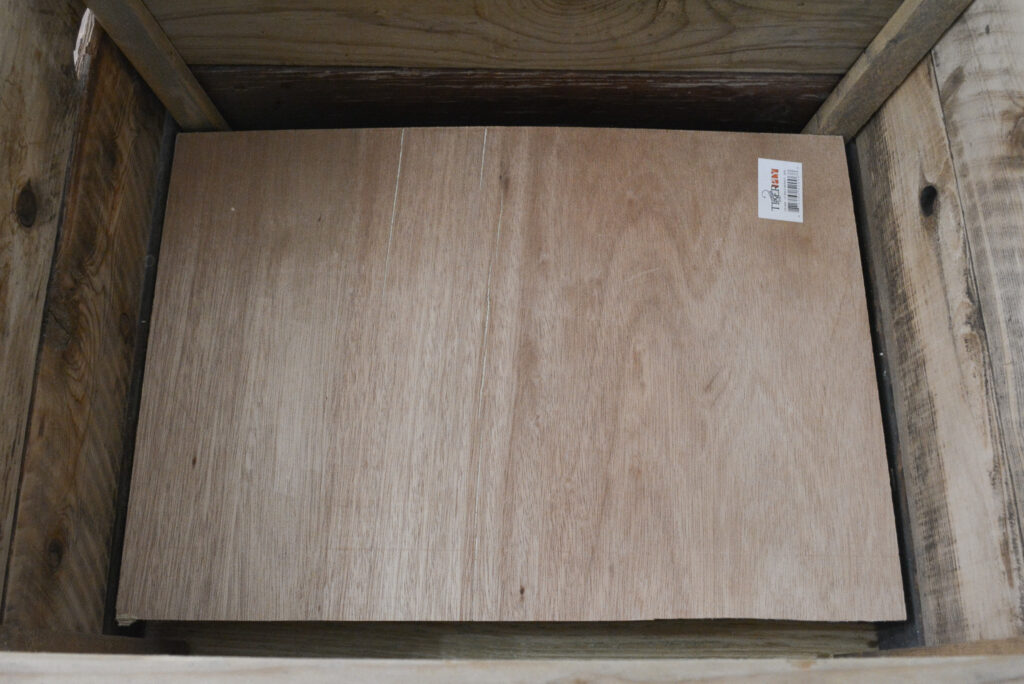
And topped them with a scrap piece of plywood. The tree stand was placed on top of that.
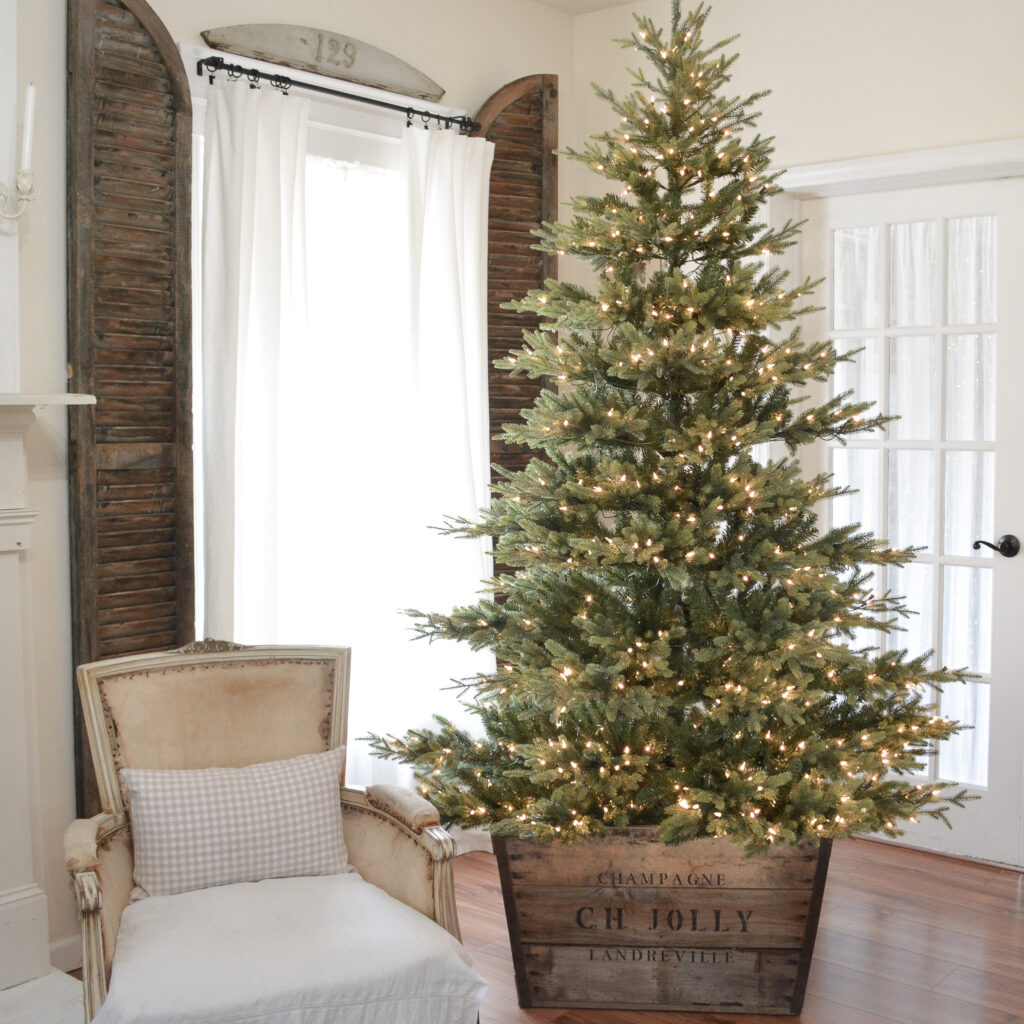
It was perfect! I also bought a new tree this year. I love it. It has that kind of sparse look, but isn’t sparse. Here is the tree link.
Speaking of perfect, this crate is anything but. I think that makes it look so authentic. I just rolled with the broken boards, the uneven edges, and the different kinds of wood.
The inspiration French champagne crate that I found was selling for over $500. I built mine for around $20. I call that a win!
PIN IT FOR LATER!
Thanks for stopping by,
Janet
So talented! Amazing!
That is so kind of you! Thank you so much for reading!
So Fab! Thank you for sharing!
Thank you! I appreciate that you took the time to read and comment!
you are very clever THANK YOU
I appreciate that so much, thank you!
Love your crate!! Thank you for sharing, will definetly try to make it!
Thank you! It was much easier than expected. I know you will love it!